|
|
|
|
|
|
|
|
|
|
|
|
|
Arches-DoorwaysBeachesChristmasCloudsDraped-ClothEasterFramesFunkyGardens-ParksGraffitiGrungeGoodiesHalloweenKidsMagazine-CoversMusicPatrioticPropsRomanceScenics-MiscScrapbookingSeasonsSeniorsSportsStairwaysStock ImagesStreaksTextureTraditionalTropicalVintage-DamaskWeddingWesternWoodFeaturedNew Releases Tutorials Subscribe |
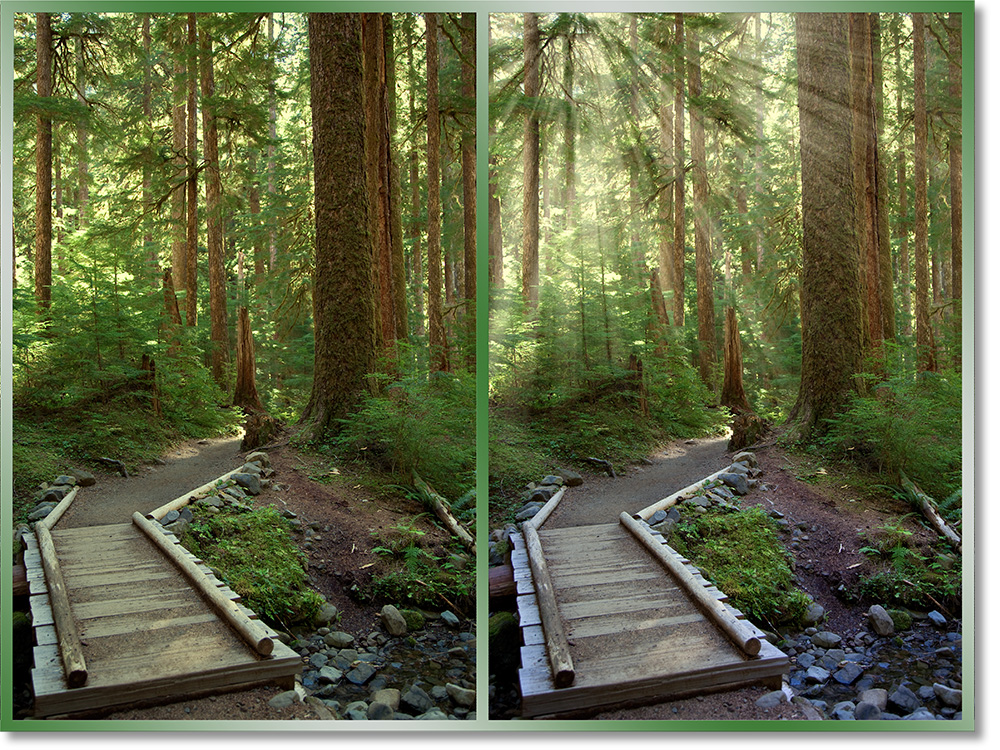
Creating Light Rays in PhotoshopIn this tutorial, you will see how to quickly and easily create rays of light in an image using Photoshop. I will be using this image of a trail in forest. This effect can be applied to many different types of situations and has many variables including direction and color. Each essential step is numbered and in bold text. Everything you need to do in order to complete the effect is in those numbered steps. Below the steps is an expanded expalanation of reasons and variables involved in each step. These need not be read to complete the task, but are helpful in understanding why we are performing each task.
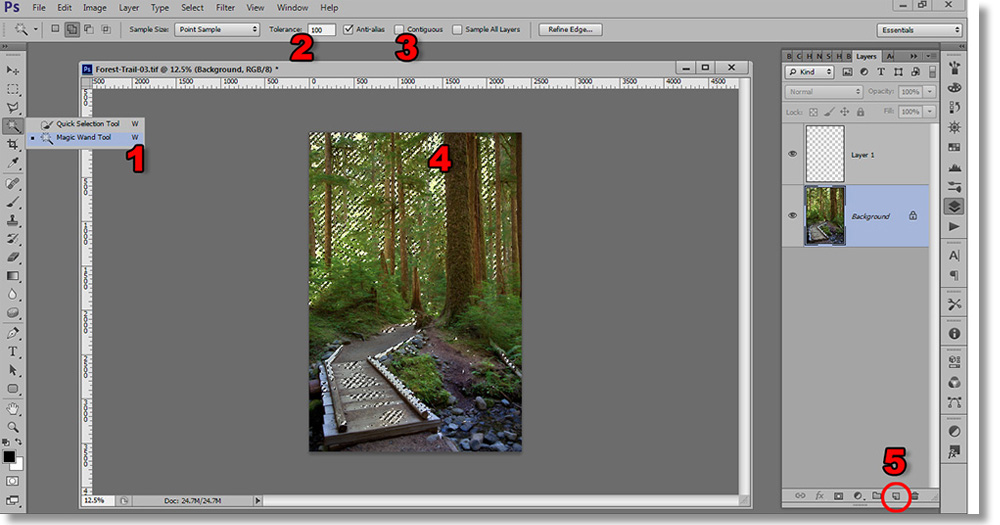
Capture the Highlights1. Select the Magic Wand Tool (keyboard shortcut “W”). The Magic Wand Tool is a selection tool that, when clicked on a particular color, creates a selection around that shade of color everywhere it exists on the image. For example if you clicked on the black key on piano, all of the black keys would be selected. The Magic Wand Tool is also capable of other selection characteristics. The way we are using it in this tutorial is its elementary function. 2. Set the Tolerance high. The Tolerance here is set to “100”. The Tolerance sets the spectrum of shades from the area you clicked on. For example, a tolerance of “1” that you clicked on a pure white point in your image, would result in a selection of all the shades of pure white that exist on your image; but nothing else.. A Tolerance of “100” would select everything within a hundred shades of the area you clicked on. The highest number is 255. 3. Uncheck the Contiguous box. The Contiguous box, when checked, selects only within pixels adjoining the area you have clicked on. Using our previous piano example, if you selected a black key with the Contiguous box checked, then only one black key would be selected. If the Contiguous box was unchecked, then all of the black keys in the image would be selected.
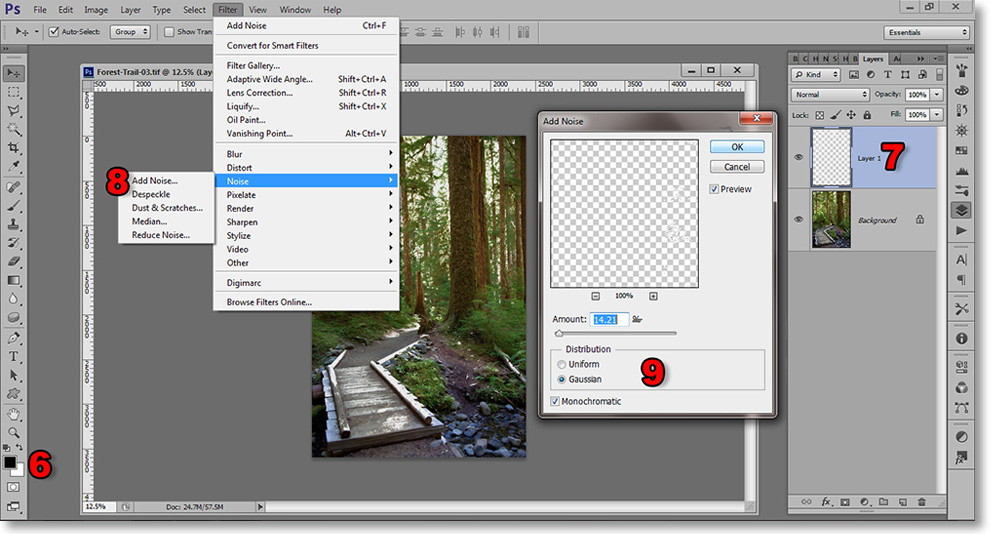
4. Click on the brightest part of the image. This creates a selection throughout the image which is indicated by the "marching ants" as its called. You may want to rid the image of the lower selected area by using the Lasso Tool, pressing the alt key and circling the lower area to deselect it. 5. Click on the Create New Layer button at the bottom of the Layers Window (F7). If you want more control over certain aspects of this new layer such as name, blend modes, opacity and other aspect go to Layer>New>New Layer…, and choose from the options within the dialog box. The keyboard shortcut is Shift+ctrl+N. I prefer to do most of that stuff as the image warrants, so I just click the Create New Layer button. There is no right or wrong way. 6. Press the “D” key This makes sure the foreground is black and the background is white within the palette. 7. Press Ctrl+Backspace This fills the selected areas in the newly created layer with white. Later I will address changing the color of the rays. That step can be done at this point if you prefer, but I like to see it in its final form as I edit it.
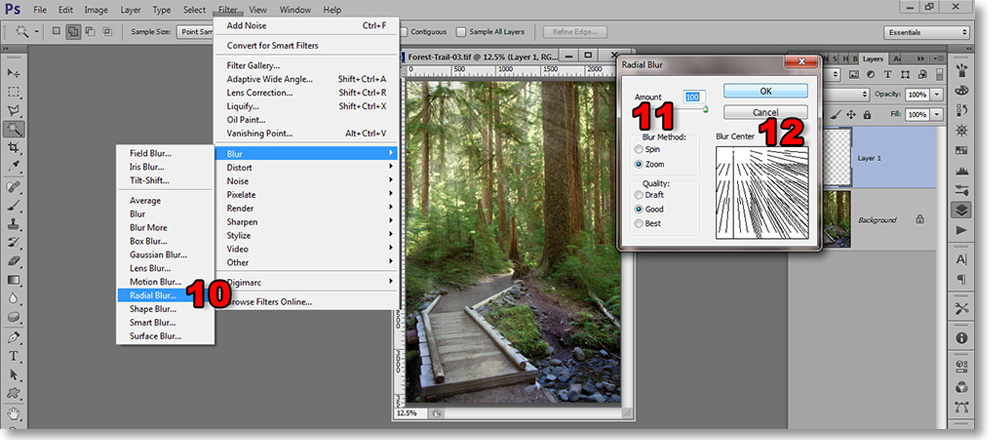
8. Go to Filter>Noise>Add Noise… 9. Select a low percentage around 15% or so. Check Gaussian and check Monochromatic. With the noise, you are creating spaces between the white pixels so that when we stretch them out, they will have more separation. Create the Rays of Light10. Go to Filter>Blur>Radial Blur… 11. Select the Zoom Blur Method and set it to “100”.
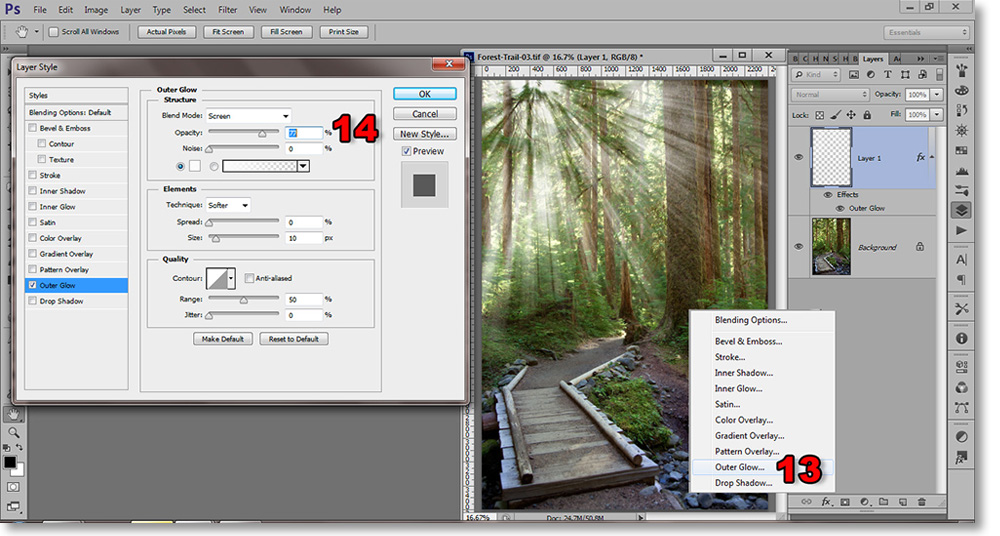
12. Place your cursor over the center and drag it to your desired point. The preview window will be centered at first. As you can see, I have placed the center to the upper left. You can put it anywhere. Intensify the Light13. Click the Styles button in the Layers Window and select Outer Glow. 14. Adjust the opacity slider until you have reached the level of intensity needed. Adjust the fill color to white. Click OK You can adjust color here as well. But it must match the previous fill color unless you are trying to create a particular effect. I wait until later to adjust the color all at once.
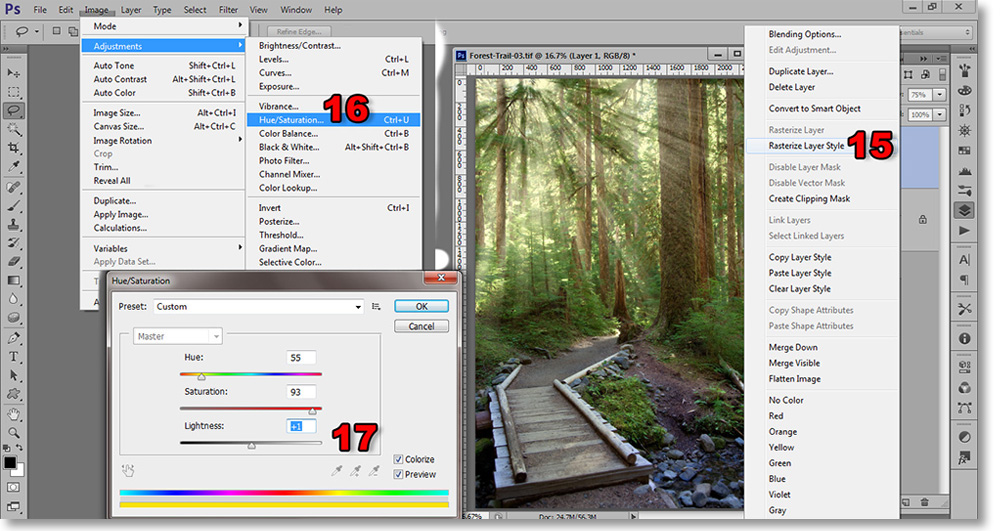
Change the Color of the Light15. Left-click over the added layer of light rays and select Rasterize Layer Style. This “attaches” the Outer Glow layer style to the original white fill rays so that they become one item that can be edited together. Otherwise, if you changed the rays to another color, the Outer Glow color would stay the same. 16. Go to Image>Adjustments>Hue/Saturation.
17. Check the Colorize box, drag the Saturation slider far to the right and darken the brightness a little. Move the Hue slider until you get the color you want.
|