|
|
|
|
|
|
|
|
|
|
|
|
|
Arches-DoorwaysBeachesChristmasCloudsDraped-ClothEasterFramesFunkyGardens-ParksGraffitiGrungeGoodiesHalloweenKidsMagazine-CoversMusicPatrioticPropsRomanceScenics-MiscScrapbookingSeasonsSeniorsSportsStairwaysStock ImagesStreaksTextureTraditionalTropicalVintage-DamaskWeddingWesternWoodFeaturedNew Releases Tutorials Subscribe |
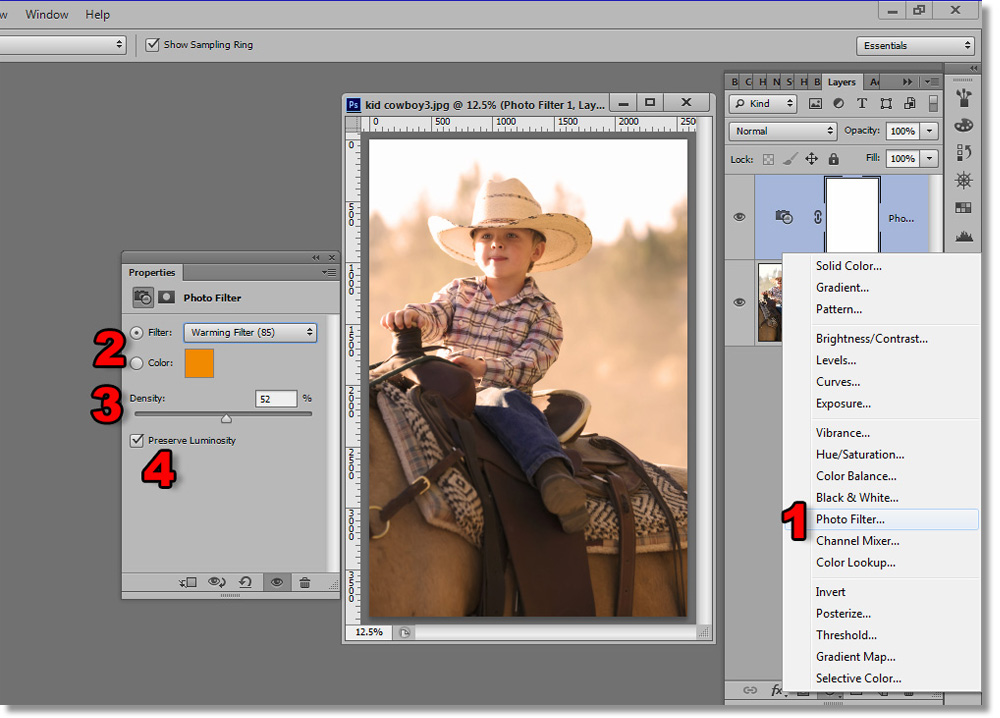
3 EZ Methods to Tint Portraits in PhotoshopKnowing how to tint an image is a required skill in today’s portrait photography world. Tinting, in this case, generally means recreating color shifts that occur over time in old prints and negatives. What was once an undesired consequence of cheap cameras and poor photo storage is now THE go-to effect in fashion and portrait photography. Luckily, this effect is quick and easy to create in Photoshop. And, as usual, it can be done in a variety of different ways. Photo Filter Adjustment LayerThis is probably the simplest method. Particularly if you already know the color you have in mind. 1. Open an image and click on the Photo Filter Adjustment Layer within the Layers Window (F7). 2. Select from the default filters or from a custom color selection.
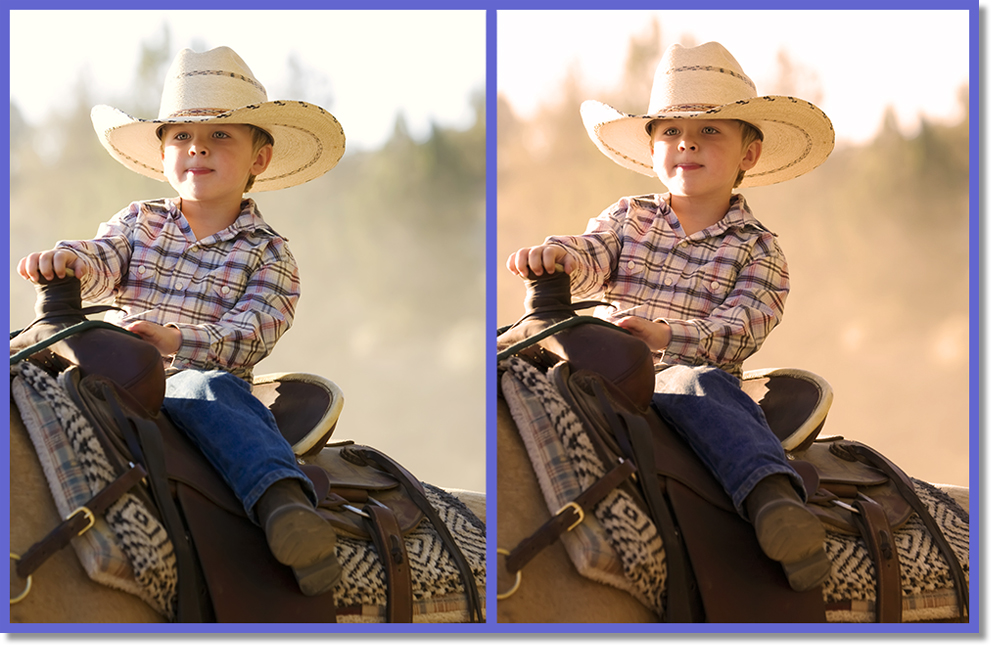
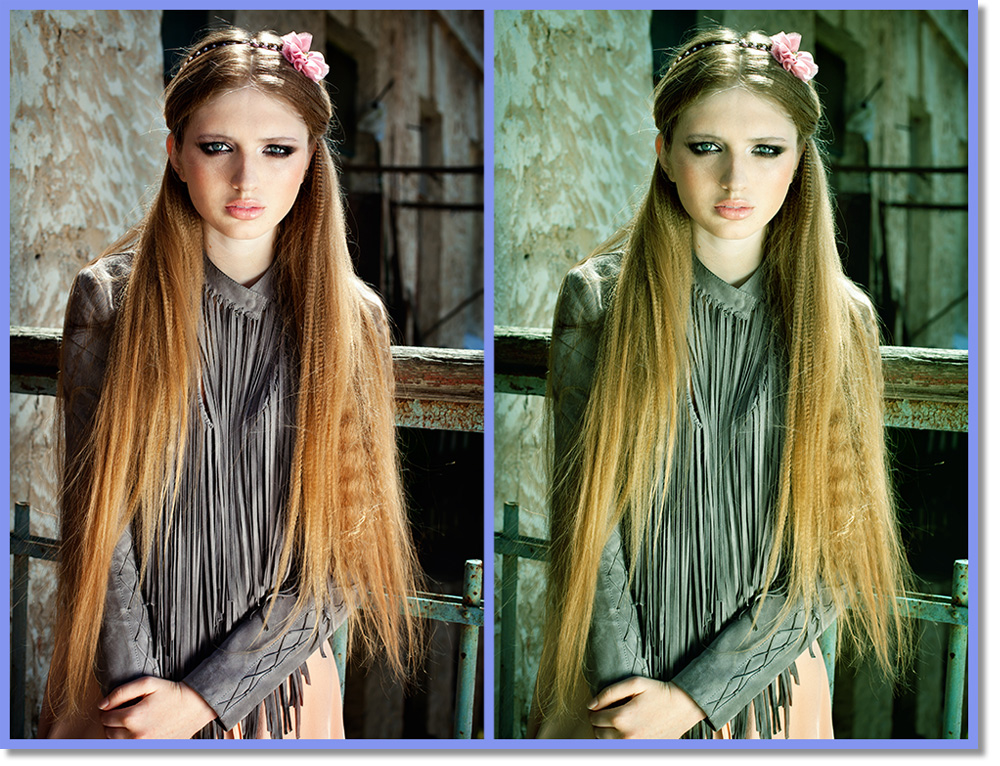
3. Drag the Density Slider back and forth until you get the right intensity for the effect. 4. Keep the Preserve Luminosity box checked unless you are looking for a different effect. Here is a before and after image of the tint.
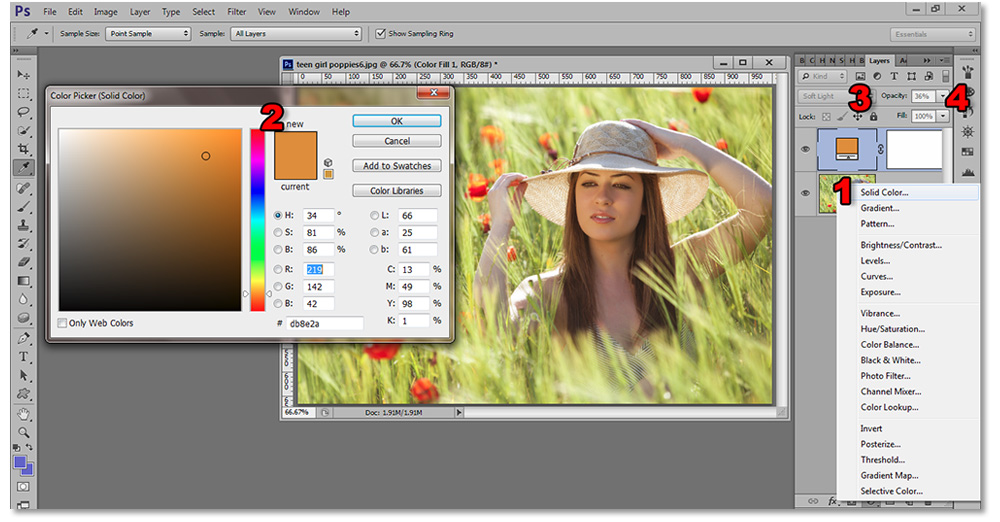
Solid-Color Adjustment LayerWhether you use the Solid-Color Adjustment Layer or the Photo Filter to tint is really a matter of preference. The Photo Filter is more of a subtle change, but both can come to the same results. The blend changes mentioned here are applicable to the Photo Filter method as well. 1. Click on the Create New Adjustment Layer button and select Solid Color. 2. The Color Picker will appear and you can choose your desired color. At first, the entire color will take over the image.
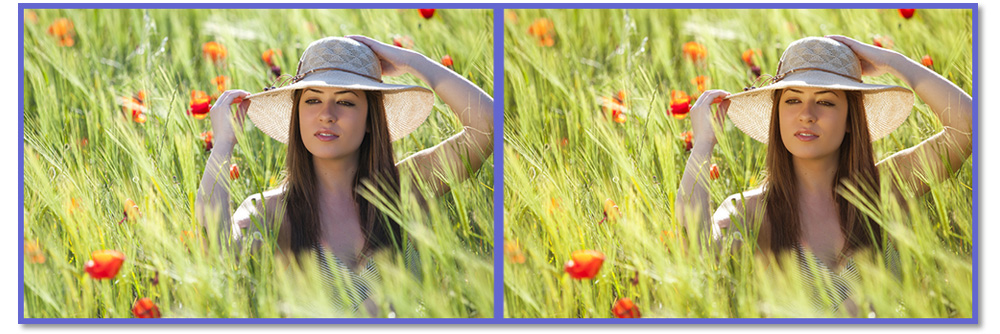
3. Change the Blend Mode within the Layers Window to Color or Soft Light. The Color blending mode will apply your tint equally over the entire image. The Soft Light blending mode will create more contrast by darkening the shadows and lightening the highlight with the selected color applied. 4. You may need to reduce the Opacity of the adjustment layer to suit your needs. You can double click the adjustment layer to bring back the Color Picker if you want to change the tint. Click on different colors to see real-time changes in the image.
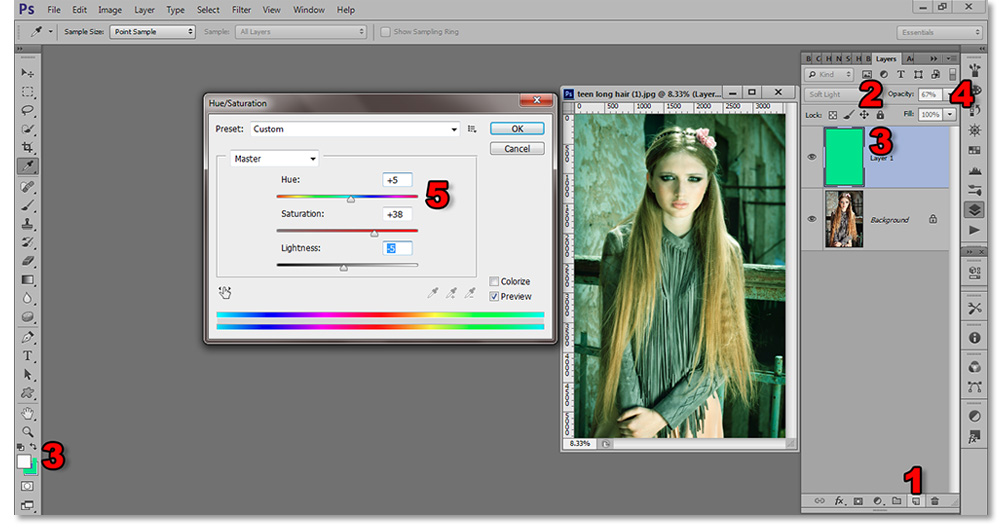
New Layer with Color FillThis isn’t technically an adjustment layer, but it serves the function as it is non-destructive to the original image. There is a Hue/Saturation Adjustment Layer available which is yet another way of tinting, but I’m going to show my preferred method of simple tinting. 1. Create a New Layer (Shift+Ctrl+N). The easiest way is to click the Create New Layer button at the bottom of the Layers Window. 2. Change the Blend Mode of the new layer to Soft Light or Color 3. Fill the layer with a solid color. My quick way of doing this is to pick a color in the Background Color Picker and press Ctrl+Backspace.
You can use any number of fill functions. The Edit>Fill… (Shift+F5) which will give the best control over details on the front end. 4. You may want to adjust the opacity to your tastes. 5. Go to Image>Adjustments>Hue/Saturation (Ctrl+U) for the Hue/Saturation function. Instead of making changes in the Color Picker which is more of a direct line from one color to another, I use the Hue/Saturation slider so I can see the gradients of color as I drag the Hue slider back and forth. Like I said, this is my preferred method. I find the workflow more intuitive than the other methods. You can also use a Gradient Tool (G) with this method for even more avenues of creativity.
Advanced Tinting & MoreIn later articles, we will discuss more advanced techniques for tinting where you can tint specifically into shadows, highlights and/or midtones, as well as using masks. However, these methods will serve the vast majority of your tinting requirements. The current popularity of this retro style includes other aspects as well like decreased contrast, light leaks, lens flares and more. EZbackgrounds is soon to release an all-encompassing tutorial on this effect. Stay updated and sign up for our weekly newsletter where you will find all of our tutorials, articles and new releases in one convenient format. If you enjoyed this article, get email free updates
|