Photoshop Tutorial: Fashion Vintage Haze Effect Inspired by Emily Soto
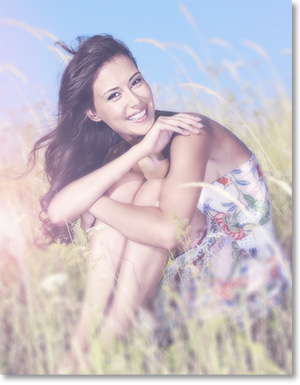
Some call it retro or vintage. Others call it hazy or dreamy. Whatever you call the effect, it’s hard to deny the popularity of this look in fashion and portrait photography. In this tutorial, we will call it the Fashion Vintage Haze Effect.
Fashion photographer Emily Soto is generally credited with the effects popularity. It has four primary characteristics that can be used altogether or in any combination with each other. These four components are selective blurring, low contrast, an off-color cast and light leaks or flares.
For portrait photographers, it’s a style that translates well into many different genres including senior pictures, wedding photography and even children or family pictures.
What Kind of Images Benefit from the Fashion Vintage Haze Effect?
Outdoor shots benefit more from this effect than studio shots. Many photographers think they have to be shooting into the sun or toward the subject’s light source to optimize the effect. However, you actually have more control with the contrast aspect of this effect if shot in traditional lighting scenarios.
A few indoor shots that would look good with this effect are portraits with solid-color backgrounds and shots with visible windows, open doors, or other light sources. It can also enhance blending digital backgrounds with subjects shot in a studio.
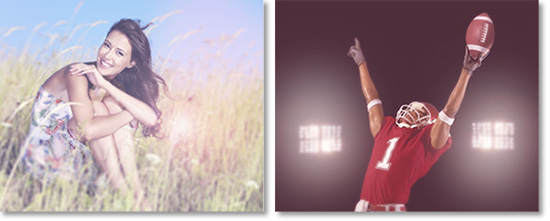
This effect can convey a sense of contemplation or playfulness with a touch of nostalgia that works well in senior or bridal sessions. It tends to work with best with female subjects. It can add an overtone of young romance with couple’s shots. This is not to say it can’t work with male subjects. We always encourage you to exercise those creativity muscles and experiment.
Blurring the Image
One of the characteristics of this style is a blurred environment except for the main point of focus. As with almost every portrait, the point of focus is the eyes.
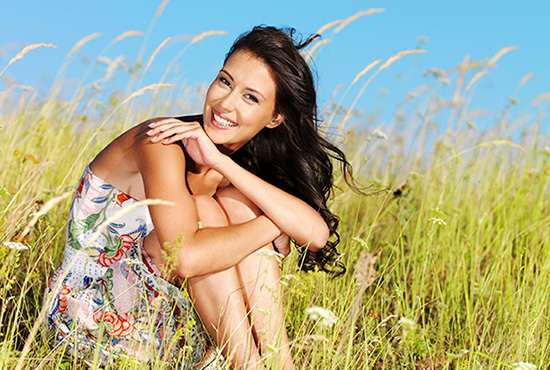
1. Open your image.
We encourage you to use your own image to practice this, but you can copy this image if you don’t have one available.
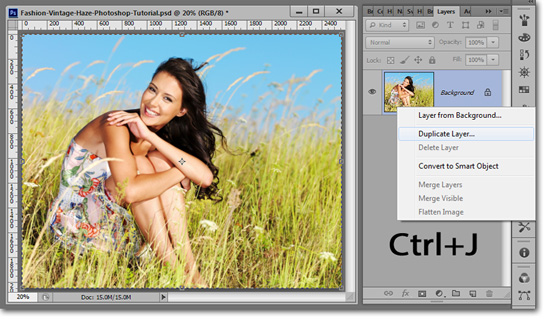
2. Go to the Layers Window (F7) and duplicate the image's Background Layer (Ctrl+J).
You can also left-click over the layer and select Duplicate Layer from the resulting drop-down menu.
3. Go to Filters>Blur> Gaussian Blur… and reduce the details of the image.
Here is where your setting will likely be different from mine here. The goal is to get the image to the point where the background loses its detail. It will take a few times of performing this effect for you to get an idea of the Blur setting you like.

A more advanced option would be to use the Lens Blur instead of the Gaussian Blur.
3.a. Alternate “Dreamy” method: Overdo the Blur, then bring it halfway back by going to Edit>Fade Gaussian Blur (Shift+ctrl+F).
This alternate method will create a more dreamy effect to your image. The concept is to basically take the blur twice as far as you normally would, then use the Fade Function to bring it back to the point you like the blur.
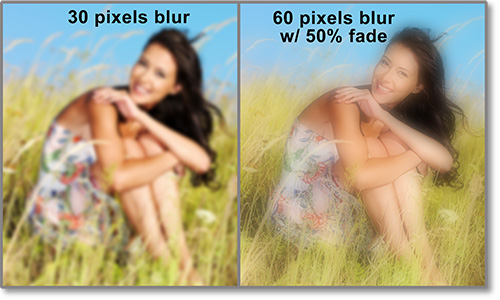
For example, if you were going to stop at a 30 pixel Blur, then go on to a 60 pixel Blur and set the Fade to 50%. Below is an example of each effect side-by-side.
This alternate effect is not available in Elements versions of Photoshop.
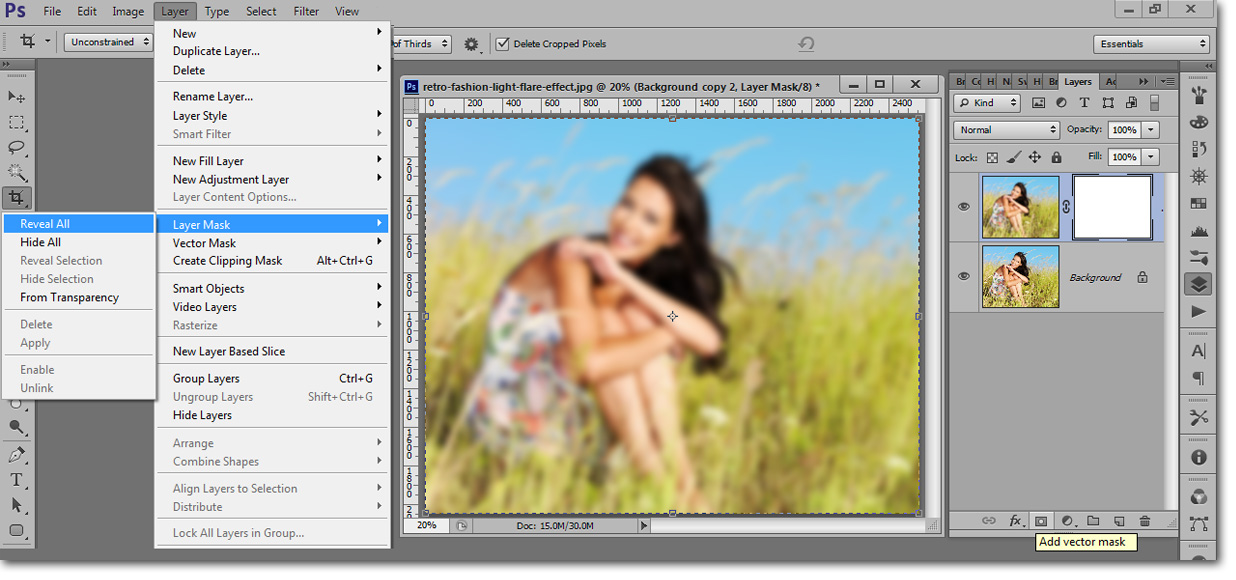
4. Add a Layer Mask to the Blur Layer (Layer>Layer Mask>Reveal All).
Clicking the “Add Vector Mask” button at the bottom of the Layers Window is much easier than going three deep into the menu. In Elements 11, the button is at the top of the Layers Window.
If the mention of Masks makes you anxious or you don’t have a Layer Mask, you can use the Eraser Tool to perform the same function, but you will not be able to go back and adjust without creating a duplicate layer, blurring, and erasing all over again.
Masks are very useful and easy to use. Give them a try if you haven’t before. You can check out our article on Masks as well.
5. Select the Brush Tool (B) approximately the same size as your subject's head with a Hardness of “0” and an Opacity of 100%.
With Elements 10 versions and earlier of Photoshop, you will not have the Hardness option. You can choose a soft-edged brush from the Basic Brushes available.
For Elements 11, click on the Brush Settings button to adjust the brush hardness. It is located in the Tool Options Bar at the bottom of the window.
6. With the brush color set to black, brush over areas like the face and body, or anywhere you wish to reclaim details.

You can create a more complex depth to an image by adjusting the Opacity to 50% and painting over areas outside the center of focus.
A more accurate way to do this is to adjust the shades of gray as you paint. White reveals everything within a layer, black hides it. All 253 shades of gray between white and black affect the layer according to the density of each shade.
My preferred workflow is to paint black over the subject’s head with a large soft brush. Then I will change the color to about halfway between white and black, and then paint over the subject’s body. This creates a gradient of blur, rather than an abrupt edge to the effect.
I may even bring the shade of the brush down to 25% gray and brush over selected areas of the foreground or background.
Create the Dreamy World
One of the most distinct elements of this effect is the dream-like haze of the environment within the image. This gives the portrait an ethereal mood which can convey contemplation, fantasy, dreams and more.
Of all the components of this effect, this is the easiest to perform. All you are doing is simply clipping the blacks from the image and making the shadows the darkest part of the image. In other words, you are reducing contrast.
1. Click on the Levels Adjustment Layer button in the Layers Window.

2. In the Levels Editor, place your cursor over the Output Levels black slider.
This is the black slider that is one of two sliders under a black-to-white gradient bar, and NOT the black slider that is one of three sliders under the Histogram Slider.
Move the black slider to the right until you get the desired dreamy effect. I usually set to “85” to begin with. I will likely need to adjust it later anyway since some of the following steps will change the image’s appearance.
I told you that step was easy.
Tinting the Image
The one other element that is as commonly used as the dreamy effect is tinting the image. As with many things in Photoshop, there is more than one way to perform a task. Tinting has even more options than most.
This method works for me because I can view color shifts as gradients with the Hue/Saturation slider, it can also be used with gradients, and I just like the workflow of it.
I encourage you to check out other methods in our article on Tinting an Image in Photoshop. Everyone has different preferences.
1. Create a New Layer by clicking on the New Layer button in the Layers Window.
2. Change the Blend Mode to Soft Light.
3. Press "D" to reset your Background Swatch to white.
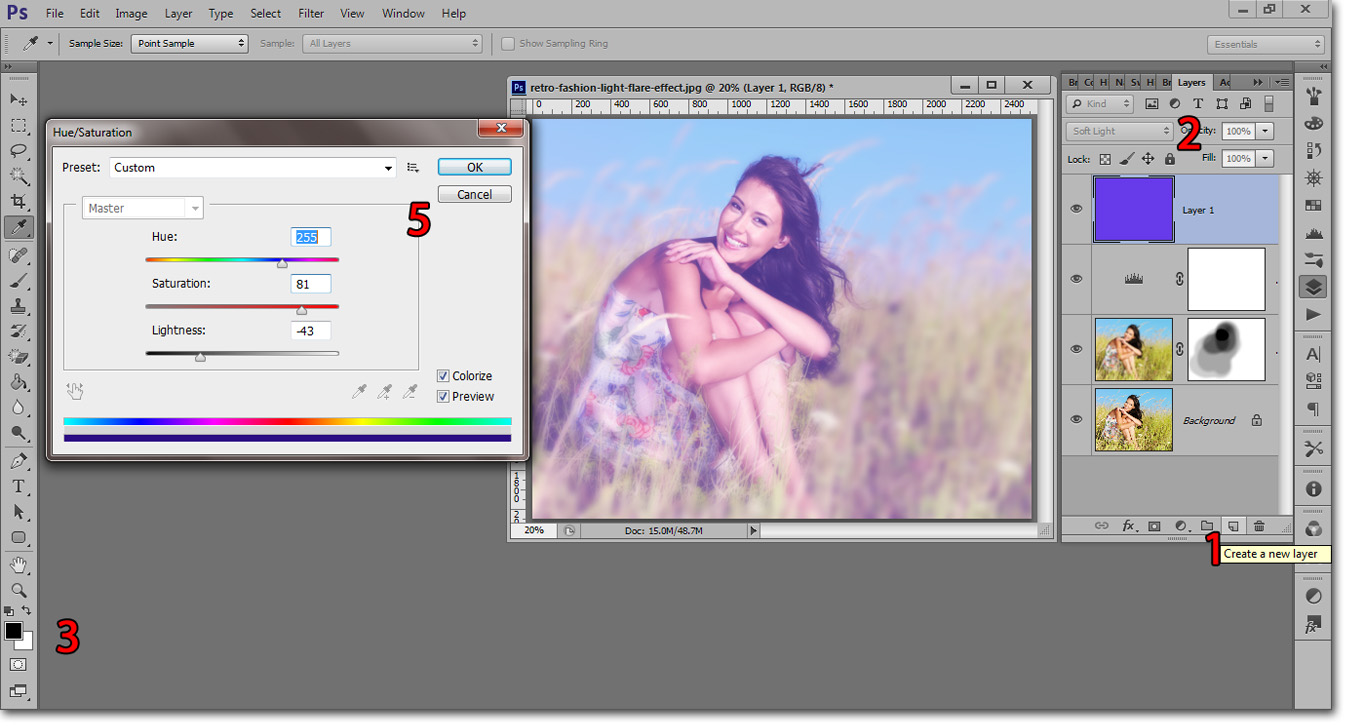
4. Press Ctrl+Backspace to fill the layer with white background swatch.
You may want to adjust the Opacity of the layer within the Layers Window.
5. Press Ctrl+U to bring up the Hue/Saturation Editor.
Drag the Hue slider until you see a color you like. You can also adjust the Saturation and Lightness from this dialog box.
You may want to experiment with different blend modes other than Soft Light. Screen and Color are a distant second and third choice, but could be just the thing for your particular image.
Adding Light Leaks
Light Leaks enhance the retro look of this effect. They can be used to frame the subject in light and/or color. Another use is to create a light flare that gives the impression of a backlit subject.
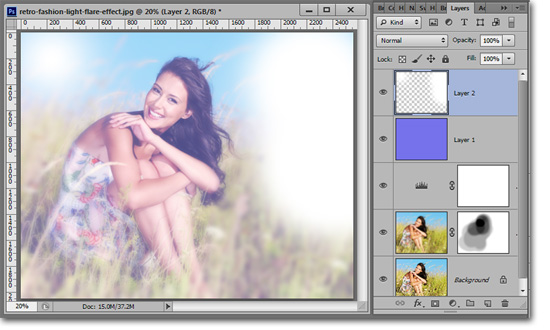
1. Create a New Layer.
2. Select the Brush Tool (B) and paint selectively over the image.
Start with a very large, white, soft brush and paint over the areas you think it will look good.
3. Blur the light leaks by going to Filters>Blur>Gaussian Blur and adjust the radius as desired.
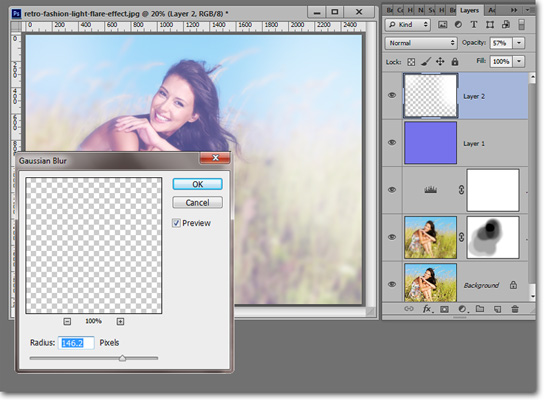
4. Reduce the Opacity of the layer in the Layers Window to adjust the intensity of the light leaks.
5. You can colorize the light leaks by pressing Ctrl+U, clicking the Colorize box, and adjusting the sliders.
Up the saturation and darken the layer. Then you can choose the appropriate color the same way we did when colorizing the Color Adjustment Layer.

6. Play with the Blend Modes in the Layers Window.
My most often used blending modes for light leaks are Normal, Soft Light, Overlay and Screen. You may need to readjust the opacity with each of the blend modes.
You can create this effect on multiple layers. Often, I will use a layer for each brush stroke of light leaks in order to retain maximum control.
It All Begins When You Are Finished.
Now is when the details are fine-tuned. Go back to each layer and adjust to get the perfect effect you are looking for. As you can see by the image below, you can make numerous variation from these four adjustment layers.
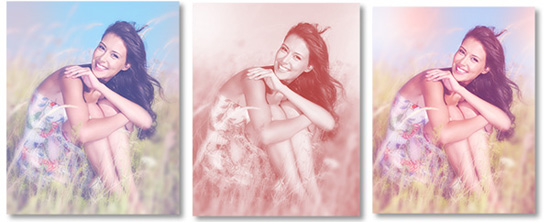
One effect that is also common is to slightly or completely desaturate the original layer and/or the blur layer as well.
Stay updated with all our new releases and articles by signing up for our free email updates. We only send emails once a week to keep you updated and we NEVER spam or share your information.
If you enjoyed this article, get email free updates
Article Takeaways
1. This effect was made popular by fashion photographer Emily Soto.
2. This effect is very popular in fashion photography, but portrait photographers can benefit with weddings, senior pictures and family pictures.
3. There are four basic components: selective blurring, low contrast, a color cast and light leaks.