Frequency Separation in Photoshop
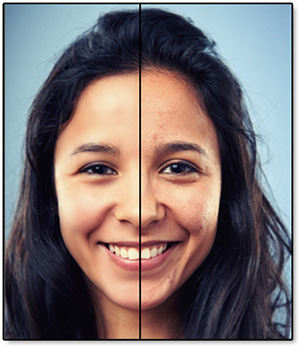
Nobody’s perfect. Even the most glamorous movie stars and models get blemishes. In fact, there are people out there whose only job is to hide the imperfections of the likes of Kate Moss and Scarlett Johanssen. These professional retouchers have a special technique that you may not be aware of.
There are plenty of tutorials about how to retouch portraits. But I guarantee you that there is no better method than Frequency Separation in Photoshop for smoothing blemishes and evening-out skin tones.
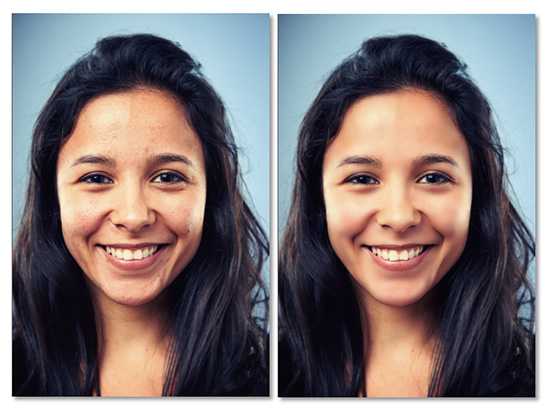
What makes it so good? This is the method that the pros use for fashion magazines. Besides being a fairly easy procedure; frequency separation retains skin texture while smoothing blemishes.
Most other methods of healing blemishes and general skin smoothing leave the subject looking over-processed. The skin texture and detail using frequency separation can stand up even under 100% magnification.
How does it work? You’re essentially separating the detail from the color and putting them each into their own layer. That way you can adjust either quality without affecting the other.
Setting the Stage
This works best in 16-bit mode, but it’s functional in 8-bit mode for web images.
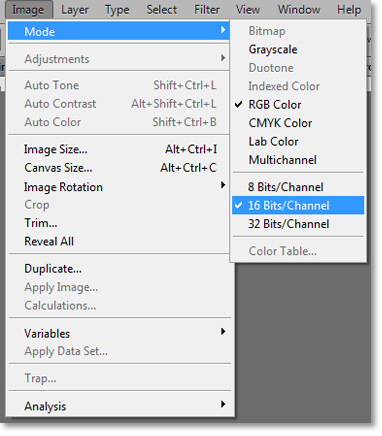
The first thing to do after opening your image is to duplicate the original Background layer twice by clicking Ctrl+J twice. Just to make things easier, name the top layer “High Frequency” and the layer below that “Low Frequency”.
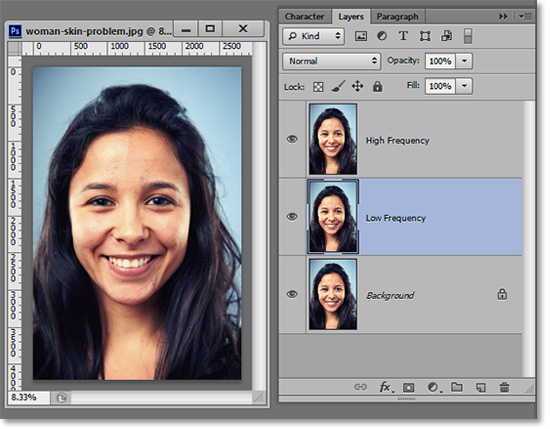
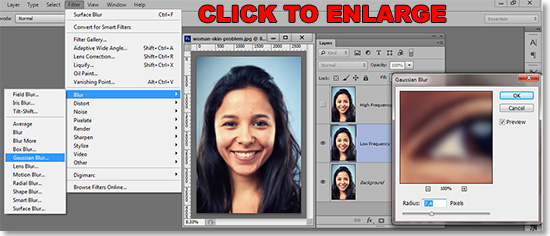
With the low frequency layer selected in the Layers Window and the High Frequency layer made invisible by clicking the eye icon, go to Filter>Blur>Gaussian Blur. The settings will be different depending on the size of your image, but the main idea is to smooth details such as wrinkles, eyelashes or hair to a point that they are gradients of color. See the eye in the Gaussian Blur editing window below for the approximate effect.
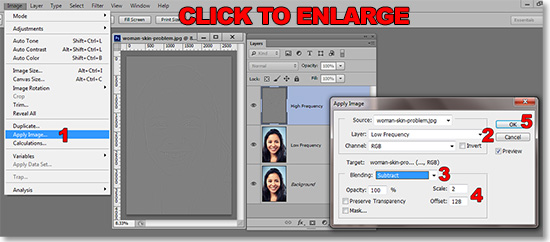
As in the image below, click on the High Frequency Layer. Go to Image>Apply Image…(1). In the resulting dialog box, select Low Frequency in the Layer drop-down menu (2). In the Blending drop-down menu select “Subtract” (3). Make sure the Scale is set to “2” and the Offset is set to “128” (4). Click OK (5).
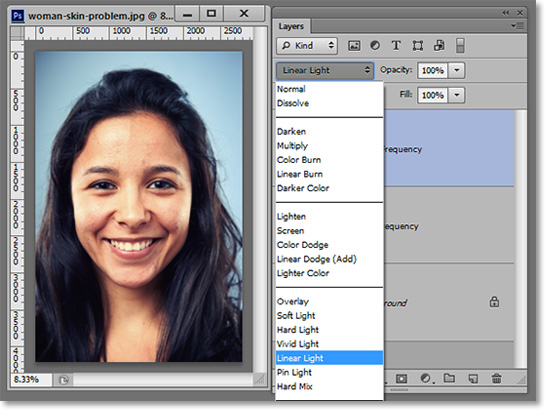
With the High Frequency layer still selected, Go to the Blending Mode and select Linear Light. It will look like nothing ever happened to the image. But you have just set the stage for the good stuff. What you just did was separate the detail (high frequency) from the color (low frequency). Now we can edit each one without disturbing the other.
Smoothing Blemishes in the High Frequency Layer
From this point on, you will want to work at 100% magnification to make sure the edits are good. The following techniques do require a little skill to do well, but it only takes a little practice and you should have it down in no time. A detailed explanation of the following tools is beyond the scope of this article, but we will soon have one that covers them all.
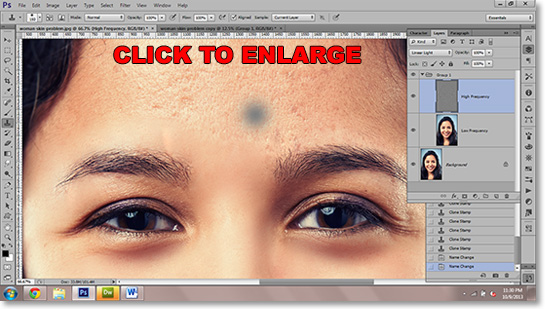
With the High Frequency layer still highlighted, select the Clone Stamp Tool. Find points in the skin that are good and press the Alt key to select that point as your source for painting over blemishes. If you are using a version of Photoshop with a preview of the source for the Clone Stamp, it will appear gray. If you are more comfortable with the Healing Brush Tool and/or the Spot Healing Brush Tool, you can use those as well.
Painting on the Low Frequency Layer
If you are trying to lighten or darken a particular area, the Dodge or Burn Tools are best on the Low Frequency Layer. Alternately, you can use the non-destructive dodge and burn method outlined in our EZTips and Tricks.
To paint a specific color, use a soft-edge Brush Tool. You can sample a specific color by pressing the Alt button and clicking on the desired color within the image.
The time needed for each image depends on the condition of your subject’s skin. Nearly anyone could benefit to some degree from this method. This one took about twenty minutes. If you’re working for print, challenging subjects could take an hour or more.
Stay updated with all our new releases and articles by signing up for our free email updates. We only send emails once a week to keep you updated and we NEVER spam or share your information.
If you enjoyed this article, get email free updates
Article Takeaways
1. Frequency Separation is the best method of retouching portraits in Photoshop.
2.The texture layer (high frequency) is separated from the color layer (low frequency).
3. Adjust texture without affecting the color.
4. Adjust color without affecting the texture.
5. It is an easy method to perform, but can be time-consuming if subject's skin is particularly irregular.


