Photoshop Layers for Beginners
Learning Photoshop can be intimidating at first. The program is so deep in its functions that the mind tends to shut down when first looking at all the buttons and windows.
Layers can be one of those things that beginners avoid in favor of playing with brushes and erasers. However, understanding the function of layers is the first step in upgrading your Photoshop skill level from beginner to intermediate. And layers are essential to working with digital backgrounds and frame templates in Photoshop
The great thing is about layers is that they are pretty easy to understand and, once learned, you open up a whole new world of opportunities to creativity.
What are Layers?
Layers are exactly what their name says they are. One element of an image stacked on top of another element of an image. An image straight from your camera has one layer; the Background Layer. Each new layer you create stacks on top of that Background Layer.
The Layers Window
In order to use the many different aspects of layers, you will need the Layers Window visible. To do this, go to Window>Layers or use the keyboard shortcut F7.
You will notice that nothing is active within the Layers Window. We need to open a new image file to access the goodies that lie within.
The Background Layer
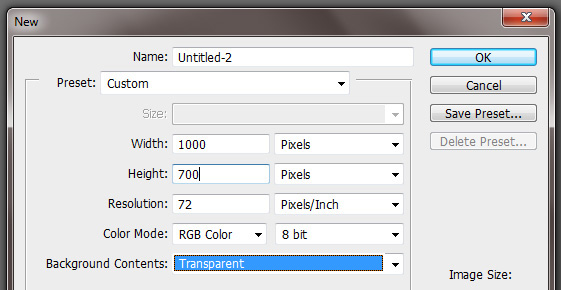
Open a new file (File>New…). Make it 1000 x 700 pixels, as shown in the image below. Make the Background "Transparent"..
Choose the Brush Tool, pick a size and color. It doesn’t matter which you choose. Now make a simple squiggle as shown in the image below.
Note: You need not write “Background Layer” or any other text as we have done here. The text is just to make the example easier to visualize and understand.
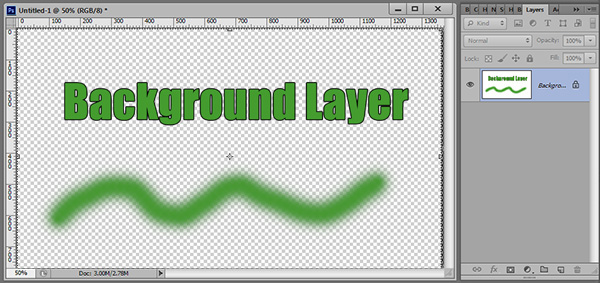
This Background Layer is locked as you can see by the icon of a lock within the Layer itself. We will get into the specifics of locking a layer in later articles. For the purposes of basic understanding, it just means that the locked layer cannot be edited.
Unlock the Background Layer
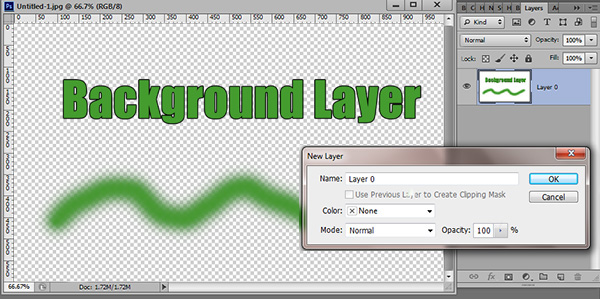
Place your cursor over the Background Layer and double-click. This will bring up a dialog box. You can rename the layer to something other than “Layer 0” or just click OK. Now the layer is fully editable.
Creating a New Layer
Create a new layer by clicking the Create New Layer button. You can rename it something other than Layer 1 or press OK.
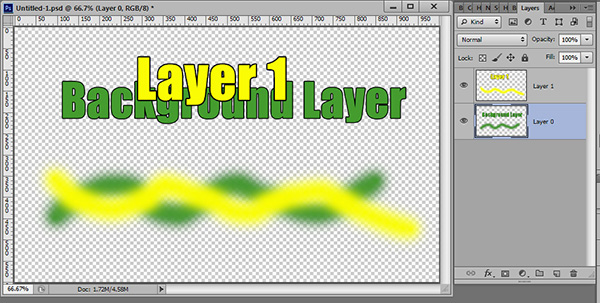
When you created the new layer, it automatically became “active”. When a layer is active, it means whatever editing you are doing is being done to that layer.
Place your cursor over Layer 0 and click once. You will see that layer become highlighted which means it is active. If you had clicked twice over the text “Layer 0” in the layer, you could then rename it. Click once again on Layer 1 to make it active.
With the same brush, pick a different color and paint over a portion of your previous brush stroke. You should now have a paint stroke on Layer 0 and a paint stroke of a different color on Layer 1.
Making Layers Invisible
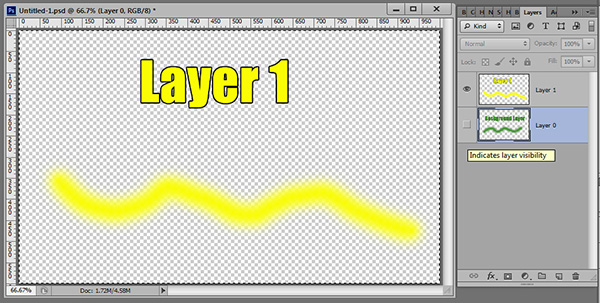
On the left side of any given layer is an eye icon. This means the layer is visible. Click on that eye and that layer will disappear and you will not be able to edit anything on that layer. Click on the eye again and the layer will reappear.
Changing the Layer Order
As you can see from your two layers thus far, when two or more layers exist, the top layer within the Layer Window is the top layer visually. Pixels on the highest layer will cover all pixels in layers below it.
To change which layer is visible, you can manually change their order. Place your cursor over Layer 1, click and hold to drag the layer below Layer 0 and release the mouse button. This can be tricky at first and will likely take a couple of times to get the hang of it. You will see a thin line become highlighted when you should release the mouse button.
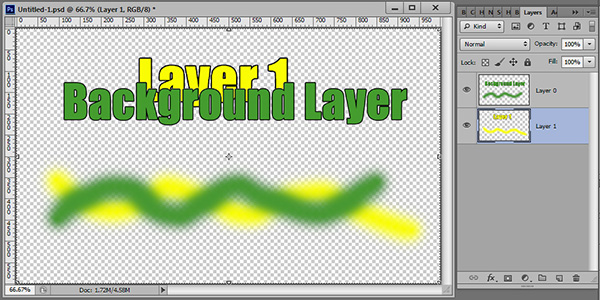
See how the visual order of the layers changed when you dragged the layer. Now drag it back.
Lower Opacity
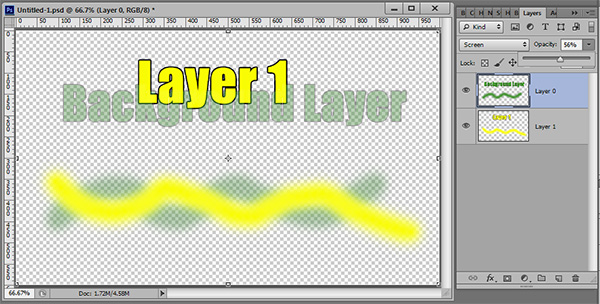
By changing the level of Opacity, you are changing the visibility of that layer. The number “0” is invisible and “100” is completely visible.
Deleting the Layer
To delete a layer, simply place your cursor over the layer you want to delete, click and hold to drag the layer to the little trash can icon at the bottom of the Layers Window.
There is much more.
Blending Modes, Locks, Adjustment Layers, Masks and Styles are just part of the palette of tools available using Layers. Next week we will see what lurks behind the secrets of masks and how they are critical to creating composites with digital backgrounds.
Stay updated on new articles and other releases by joining our email list. Your information is never shared with third parties and we don’t overdo it with the emails.


