Hand Posing Secrets of the Pros
It was many years ago and I was at my first real shoot with a paid model. I had planned every detail from the backgrounds, lighting and wardrobe all the way to the shot list, makeup and extra batteries. I had left nothing to chance… or so I thought.
I was taking test shots when she asked, “What should I do with my hands?” holding them palms out to me like she had just discovered their existence.
I paused, then stammered something incoherent. I realized I had no idea what she should do with her hands. The effect was horrific.
I began to panic as her hands contorted, fingers twisting in all directions. She had become aware of her hands and didn’t know what to do with them.
With all my planning, I had overlooked the tiniest of details and the shock of it left my mind blank as to what to do with her hands. I’ll tell you how it worked out later, but one thing is for sure. I would have been much better off had I known these few principles back then.
So Many Option, So Few Ideas
When it comes to posing hands, there is much to remember and consider. There are ten fingers with three joints and two wrists; the possible posing variations are well into the thousands. However, with only a few basic principles in mind, you can get through nearly any situation without sweating all the small stuff.
Don’t think of this as a list of rules as much as a set of guidelines or principles. For every do or don’t put forth here, you should be able to think of at least one situation where the opposite principle would be better used. Like most photographic principles, whether or not to use it depends on whether it serves to benefit the image.
In this article, we’ll let you in on all the little secrets to hand positioning and placement. But, more importantly, we will prioritize best practices so that information overload won’t freeze up your brain like it did mine way back on that day.
1. Bend It Like Beckham.
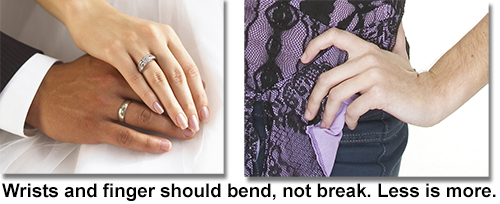
This principle applies to hands as well as the rest of the body. A curved line is more visually interesting than a straight line. Wrists should bend, not break. Less is more when it comes to bending the fingers and wrists.
As a general rule, fingers should be relaxed and spread just slightly. Staggered fingertips are more aesthetically pleasing as well. The more tapered the fingers, the more feminine they will appear.
2. Hands on a plane.
Think of the model’s hands as being on a plane. Not an airplane, but a spatial plane. Like the invisible glass on which a mime places his hands.

No matter the angle of the pose, try to keep hands on this plane parallel to the camera’s lens to prevent foreshortening of the hands. Foreshortening is the effect where objects appear smaller as the distance from the camera increases; whereas objects closer to the lens appear larger.
3. Don’t let the right hand know what the left hand is doing.
This is another principle that applies not only to the hands; but to virtually anything that comes in twos. Sameness is boringness. Differences are dynamic. Change up the height, position, etc. between the two hands and you will find your image more intriguing.
4. Show me the pinky.
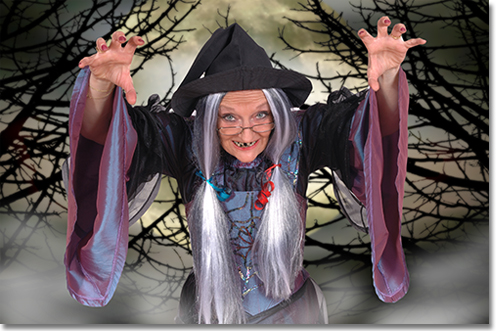
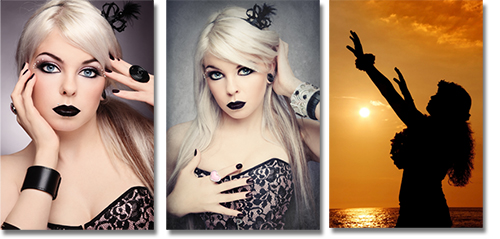
The pinky-side of the hand is considered more aesthetically pleasing than the broad side. This is true more with, but not exclusive to women. Broad or otherwise bold hand gestures convey masculinity. A fist will almost always convey aggression.
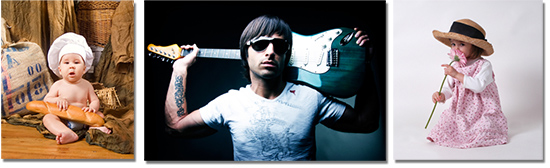
5. Hold something.
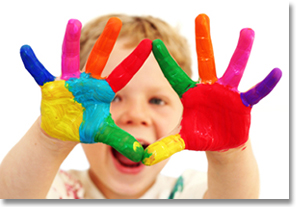
This is virtually essential for kids. You may have a chance of getting children to pose for you, but getting them to consciously position their hands can be quite a challenge.
It’s not a concept just for kids, though. Having a model hold on to something is one of the best things you can do for natural feeling hand placement. Plus the prop can serve to further the images impact as well.
Along the same lines, holding one’s hands or resting them on a surface that is being leaned on or against can take away from the feeling that a model needs to be doing something with their hands. Resting fingers on a flat surface tend to create pleasing lines.

6. You won’t go blind, we promise!
Have your subject put their hands on different parts of their body for different effects in both visual lines and the projected or implied emotion.
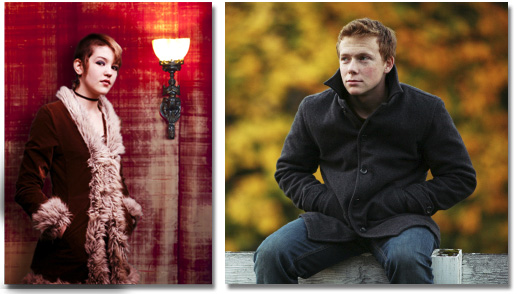
Have the model put one hand in their pocket. This gives a casual feel to the image.
If your subject is leaning on something or sitting, one hand on the chin may imply contemplation of thoughtfulness. Both hands can indicate playfulness while also framing the face and creating a desired pyramid effect (See “Pyramid Effect”).

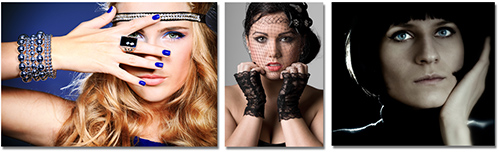
A hand on the neckline can be seductive, particularly for women. Both hands can convey style or even pride. This pose can also create a triangular or pyramid effect within the portrait.

Putting one hand on the opposite arm can slenderize a subject. It can also give covey a sense of shyness or innocence.
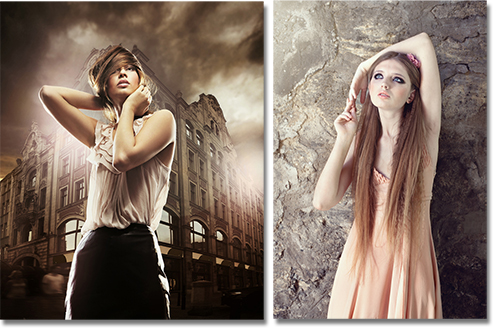
Having your model put both hands on top of or behind their head can create a dynamic presence in both lines and attitude.
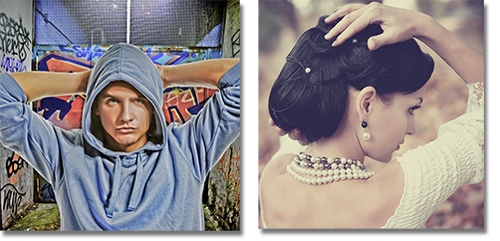
The closer the hands come to the face, the more impact they are going to have on the image. The face is usually the focal point of a portrait and the hands can work together with the face to project any number of emotions.
If the hands are close enough to your subject’s face, they will serve as frame or at least draw the viewer’s eye to the subject’s face.
If your subject is sitting, then it can feel quite natural for the model to place their hands on their leg or lap. Try to avoid overlapping hands as it tends to look cliché. Interlocking hands should be avoided with even more vigor than simply overlapping. It is just not a visually pleasing sight in most instances.

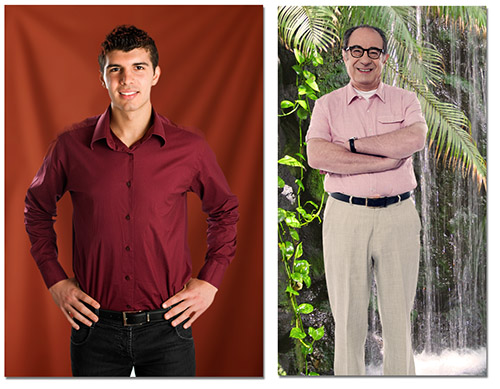
Another pose that has become cliché is placing one’s hands on their hips or waist. You will likely be unable to avoid it completely as it does feel natural for the subject and creates pleasing lines to most peoples outline as it can slenderize or accentuate already good form. Just remember to ask yourself at the final edit whether it looks like a thousand portraits you’ve seen before.
If your subject’s arms are folded, do not tuck either of the hands. Both hands tucked looks closed off and one hand tucked with one hand out looks uncomfortable even though that’s how most of us do it. Make both hands visible. Have them hold their arms slightly away from their body and make sure they are not grasping at the other arm. This will undoubtedly feel awkward, but looks much better in a portrait setting. Also, point the fingers upward; which leads us to the next principle.
Other things to keep in mind.
Think of the waist as the dividing line for finger direction. Hands above the waistline as mentioned before should generally be pointing upward. Hands below the waist should point downward.
Keep an eye on the veins on people’s hands. If they are prominent, have them raise their hands above their head for a few seconds before bringing them into posing position.
In group photos or couples photos, watch out for hand spiders. Try to keep the back hand invisible. When people put their arms around each other, the back hand tends to poke out at the oddest places.
Be sure to mention in the client’s checklist that groomed fingernails are preferred. You should have a backup of glue-on nails at your disposal. Simple clear-coat, French, tips, or basic colors are preferred. Highly designed nails will attract attention and become the focus of the image.
So, about that first photoshoot...
For the first half of the shoot, nearly all of my shots did not include the hands. Luckily, once we got into the rhythm of the shoot, posing direction became more natural. But, as a last resort, hiding hands is a sound practice.
For some reason, this comes as a prominent recommendation by many portrait photographers. I may be in the minority on this; but for me, hiding hands and putting hands on hips tells me that the photographer wasn’t hand-posing savvy or was being lazy.
In retrospect it seems absurd that I didn’t know what to do with the model’s hands, since they probably have more variety of posing options than any other body part. Don’t let them be an afterthought as they are probably second only to the face in potential impact on your portrait images.
Your Assignment: A Show of Hands
Get out there and shoot some hands! Or, if it's bad weather, stay in and shoot some hands. If you have a willing subject or even an otherwise unwilling subject that you can coerce; capture some images that utilize the hands.

Even if you don't have access to good lighting, forget about the pictures and practice your posing direction. If you can't do that, shoot something... anything! Remember, photographers photograph... always.
“Taking pictures is savoring life intensely, every hundredth of a second.” ― Marc Riboud (google him and click on images)
If you enjoyed this article, get email free updates
Article Takeaways
1. If it bends, bend it. But just a little.
2. Try to keep hands on a plane parallel to the camera.
3. If you have two of them, make them different from each other.
4. Pinky side out is the most aesthetically pleasing angle.
5. Hold on to something
6. Hands on various parts of the body, convey different attitudes and project different lines.