Posing Secrets for the Legs and Feet
In the latest installment of EZbackgrounds’ continuing series on posing subjects in portrait photography, we will reveal some basic dos and don’ts of posing legs and feet.
Legs and feet are shown in relatively few portraits. As a rule, you don’t include anything below the waist unless you know exactly why it should be shown. However, you should pose the legs even if not included; because their positioning will imply themselves in the other parts of the body that are visible.
If We've Said it Once...
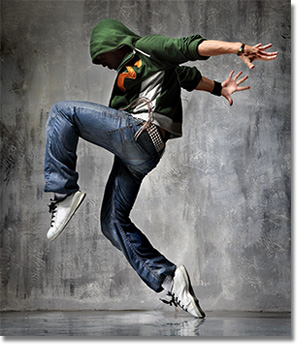
As always, if it bends, then bend it. Slight angles in joints are almost always more appealing than straight lines. Less is more, though. You shouldn’t angle legs at ninety degrees or harder angles unless specifically warranted. Legs should also rarely be posed higher than the hips.
Remember that if you have two of them, they should be posed differently. This also applies to legs and feet. If possible keep a space between the thighs by elevating or bending one or both of the legs. Keep in mind that the hips should be posed diagonally and the legs will be obliged to be in different positions.
Make sure you’re not cropping people off at the joints or the leg will seem amputated. Always crop at the midpoint between the hip and knee, or at the knee and ankle.
Never let the leg exit the frame at the thigh, then reappear at the shin. It will look like a disembodied foot entering the frame.
Put Weight on the Back Leg
A good way to apply two principles at once is to keep the leg farthest from the camera stationary or use as a base leg around which the subject can move the other leg into different poses. Putting a subject’s weight on the back leg creates more appealing curves; particularly in women. Using the leading leg to change up poses while keeping the other leg stationary allows the model to be more easily directed by you.
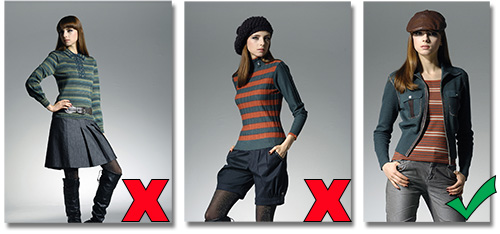
Shorts and short skirts should be avoided in traditional portraits. Pale skin, veins, hair, cellulite and fat all conspire to ruin an otherwise good portrait. Legs, more than any other body part, do not generally look pleasing in portraiture unless absolutely perfect. And, even then, unless the legs are the subject of the portrait, the exposed skin will detract from the subject’s eyes.
Women with good legs will often want to show them off. However, anyone who has watched American Idol tryouts knows that people can be somewhat delusional about their own endowments. If you find a client wants to show off legs that are less than perfect, you can tactfully point out that clothed legs in a portrait are preferred since bare legs draw away from the eyes which are the desired focal point.
Shooting legs straight-on will make thighs look larger. You want to create as much length in the legs as possible. Shooting from a low angle will make the legs appear longer. Easier than shooting from a lower angle may be elevating the subject on a platform.
Another way of lengthening the legs is to use a wide-angle lens. However, you should watch for the side-effect of the feet looking enlarged. If this occurs, you can crop them out or de-emphasize them in the shadows.
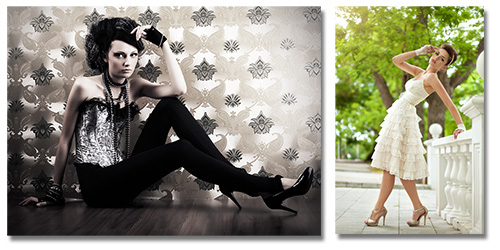
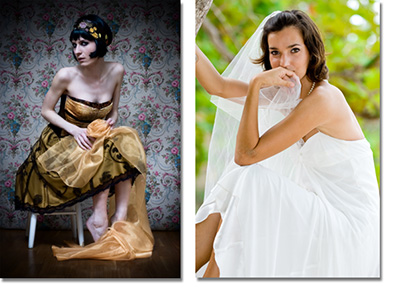
A popular pose you have likely seen being used by movie stars on the red carpet is the standing legs-crossed pose which can have a slimming effect on the thighs. Alternate the pose with legs together and slightly separated to see which one gives more pleasing lines.
Sometimes you can also create more pleasant lines by having the subject flex their thigh muscles. It can give a little tone to otherwise flabby legs. If the subject is leaning, avoid mushrooming of the buttocks or thighs by having the subject rest on a hard part of the body like the shoulder or elbow.
Just Put One Foot In Front of the Other
Feet are actually relatively easy to pose. The problem with feet comes with people’s insecurities about them. Few body parts inspire such self-loathing as feet. Be aware of this if bare feet are called for in a shoot as your subject may become more anxious and rigid which may lead to overextended or curled toes.
Other issues with feet can be brightly painted toenails on women that would distract the viewer’s eye. Neglected toenails, which are more likely on men, can also be a problem for obvious reasons. And I won’t even get into the possibility of a ruined shoot due to bad foot hygiene.
You should always keep your subject grounded; even if it’s just the tip of the toes barely touching the floor. Avoid showing the bottom of the feet. If it does become necessary for whatever reason, bare feet are preferable to the soles of shoes. Just make sure they are clean.

The main thing to remember about posing feet is to make sure they are not flat on the ground. If your subject has bare feet, have them extend their feet which will flex the calf muscle, making it more visually appealing. If the tone of the portrait allows for it, have the client wear high-heeled shoes which create the same effect. If they are wearing flat shoes, simply have them put their weight on the ball of their feet.
A lot of times it’s just better to hide the feet. Which brings us full circle with the reminder that, if you don’t need them, don’t show them.
One of my favorite things about photography is that no rule is written in stone. Part of creativity is breaking the rules. But you have to know the rules before you can break them effectively.
“You don't take a photograph, you make it.” ― Ansel Adams
Stay updated on new articles and other releases by joining our email list. Your information is never shared with third parties and we don’t overdo it with the emails.
If you enjoyed this article, get email free updates
Article Takeaways
1. Keep weight on the leg farthest from the camera.
2. Make sure your subject is grounded.
3. Keep the feet extend with weight on the ball of the feet.
4. The shoulders can be positioned to cover or minimize problem areas of a subject's body.
5. If all else fails, hide them.