Photomerge and Content-Aware Fill
With all the complexities of Photoshop, it’s a relief to have a couple of super-easy “one-click” solutions that do really cool things. In this tutorial, we are going to show you two cool things that defy explanation. It’s as close to magic as Photoshop gets.
When I first heard of Photomerge being included in Photoshop, I was skeptical. Stitching several photos into each other to create a panoramic scene was time-consuming and tedious work. One would have to merge and stitch and tweak and retweak manually for hours to get images to stitch together realistically.
Then later, when I heard Content-Aware Fill was being included, I was again skeptical. I’ve spent more hours than I can count filling in an area with the Clone Stamp Tool with nothing more than a tiny source sample. How could an algorithm detect the subtle differences in texture, color, and tone with the click of a button?
I’m happy to say that I was wrong on both counts. The geniuses at Adobe development managed to do the impossible. What would have taken at least from four to eight hours before, now only takes a minute or two.
Capturing the Images
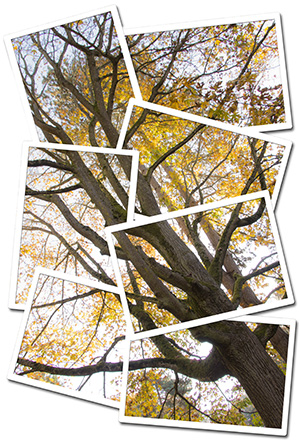
A short aside here about how to shoot for a stitched panorama photo. Take a shot, twist a little and stop, then twist again and stop to shoot. Be sure to stop to take your shot. There’s a higher risk of blurring the image if you snap while in motion.
Make sure to overlap each edge of the image. For example, if a tree is at the left side of your image as you’re twisting left, then be sure that tree is at the right side of the photo when you take your next image. This makes it easier for Photoshop to know where to connect the images. Also, keep in mind that you don't need to be linear in your shooting.
Stitching a Panorama with Photomerge
Go to File>Automate>Photomerge. A dialog box will appear. From the drop-down menu at the top, you can choose to from a series of images or the entire contents of a folder by selecting ‘file’ or ‘folder’. For this tutorial, we will use a series of four images of a mountain lake.

On the left side of the dialog window, you will see different options as to how you would like your images stitched together. I find Auto works more often than not. Every image is different, so experimentation may be needed.
There are three options at the bottom of the dialog window that affect the image. You will almost always want to check the “Blend Images Together” option unless the automatic option isn’t working.
If you have vignetting in your images you may want to select the “Vignette Removal” option. I ran these through Lightroom first, so there were no vignettes. You’ll know once the process is done whether you need that option or not.
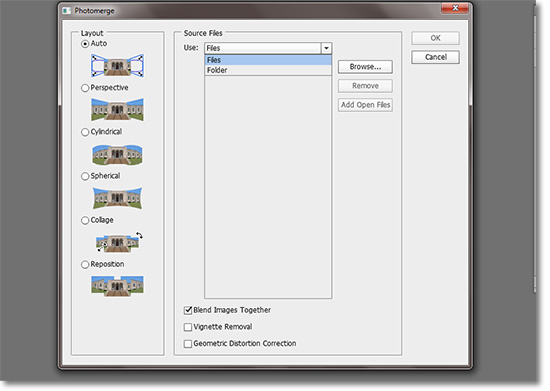
To access your source images, click on the Browse button, then OK once you’re finished.
Depending on your computer and amount of images, the process may take a little while. When finished, you will be left with all your layers intact with masks ready for any further editing if necessary. I’m always amazed how well it works, but get in there at 100% and make sure; particularly if the image is going to be printed.
Content-Aware Fill
This is even easier than the Photomerge function. First, bring all your layers together by clicking ‘Merge Visible’ in the drop-down menu at the top-right of the Layers Window.
Select the Magic Wand Tool and click on the bare area around the image with the ‘Contiguous’ option unchecked.

Then go to Edit>Fill and select Content Aware from the drop-down menu. Click OK and give a moment to process and you’re done. Well, you might want to deselect the area by clicking Ctrl+D, but that’s it.

Two amazing “slightly-more-than-one-click” functions that do exactly what you want them to do and they only take a few minutes. It doesn’t get much better than that in the Photoshop world.
Stay updated with all our new releases and articles by signing up for our free email updates. We only send emails once a week to keep you updated and we NEVER spam or share your information.