Posing Guide for Shoulders and Torso
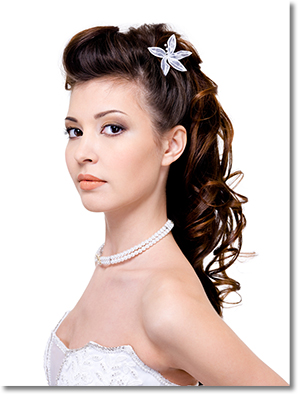
Shoulders are one of the key elements of almost any portrait. They are often the foundation of the desired “pyramid effect” which we will cover in this article. Their positioning can convey signals from dominance and rigidity all the way to artistry and elegance. In this article we will reveal the subtle and not-so-subtle signals that various shoulder poses convey to the viewer of a portrait.
So Whatcha Want?
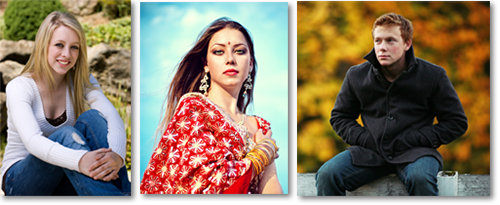
This is a good place to mention the importance of communication between you and your subject. If you are shooting a client, you need to know what they expect from their portrait.
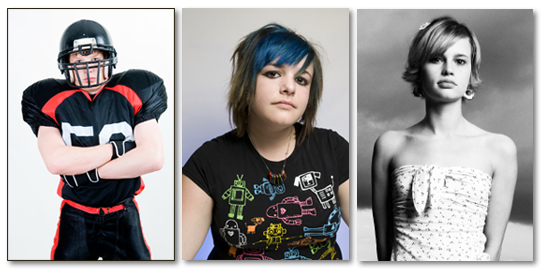
Everyone’s tastes are different. After reading this article, you will know that straight-on shoulder poses are best avoided. But if you are shooting the football team, straight-on shots are likely your best choice. This is an extreme example, but the message is relevant. Know what your client wants and how you are going to give them that before the shoot ever begins. You will find your sessions going much smoother and your sales going much higher.
The Power of the Pyramid
We mention this numerous times in our other guides because it is as close to a “rule” as you can get in portrait photography. It is referred to as the Pyramid Effect, Triangular Effect, and even Diamond Effect when referring to full-body poses. It is considered aesthetically pleasing to create a pyramid or triangle within a portrait. Why this is true is a matter of some debate and conjecture. But as with many true things, the “why” is not nearly as relevant as the “how”.
In a head-and-shoulders portrait, the shoulders are the base of the pyramid. In upper-body portraits, they shoulders are mid-point between the base and the peak.
What's Your Angle?
Shoulders should almost always be posed at a diagonal angle. As we’ve mentioned before, straight lines are boring. Diagonal lines are more dynamic and intriguing.
Avoid straight-on shoulder poses which make a person look boxy or rigid. In addition, you don’t want your subject to pose at a ninety-degree angle to the camera.

Avoid what is commonly called “football shoulders”. This a term used to describe when a person’s shoulders are hunched up, giving the appearance of little or no neck. Also, don’t let your subject slouch. Be sure your subject’s neck is extended and their shoulders dropped and back.
The generally desired pose is to have the shoulders a quarter turn or forty-five degrees to the camera. Often called a “three-quarter pose”, this angle is likely the most flattering and creates a nice base to the previously mentioned pyramid effect.
The Shoulder Bone's Connected To The...
Obviously, our body parts are connected. So, even though this article is essentially covering shoulders; it would be impossible to speak about them without regard to the arms, neck, and spine. With that in mind, I am going to touch on a few connected parts that will be, or already have been covered more extensively in other articles specific to other body parts.
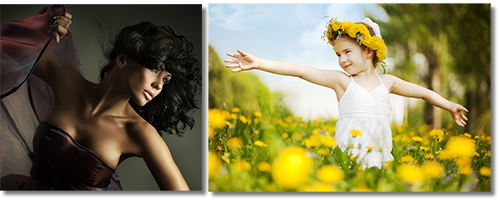
What is true about diagonal lines is also true of the spine. Sitting straight upright will give a static feel to the portrait; whereas having your subject lean slightly forward will actually give your image a sense of motion.
On the other end of the spectrum, it can be beneficial for female subjects to lean slightly away from the camera which will push the forward shoulder upward slightly. This can be done for subjects that are sitting by raising the leg nearest the camera or by placing a small pillow on your posing stool under the leading buttock cheek. For standing subjects, have them put their weight on the back leg which is a good rule of thumb in many standing poses.
Just The Way You Are
Unconditional acceptance is certainly a wonderful sentiment and definitely what we want to hear from our loved ones. But most of are at least a little self-critical and we all want to look our best, right? Sometimes our best means de-emphasizing some of the flaws that come with being human. Here are some tips to posing shoulders to ensure your subject is looking their best.
Men tend to carry their weight in their mid-section. The principles we’ve covered so far go a long way toward slimming a subject’s torso. There are also a few other tricks the pros use to minimize its visibility.
First, it is best to stand an overweight subject. Sitting can create a paunch in even the fittest of people. This is a good principle for women as well since sitting down can create a mushroom effect on the hips.
If you can’t stand them, lean them. A stool at a taller height that forces the subject’s legs to be more extended is almost as good at slimming the torso as is standing; while giving the appearance of being seated.
For women, a bra strap digging into the shoulder can reveal extra pounds even if no obvious rolls or folds are obvious. A quick tug on the shoulder of their shirt can remedy this situation. Also, it is better to cover shoulder unless there is a specific reason for them to be exposed.
Although not as versatile as arms and hands at covering problem areas, a simple rise of the leading shoulder can hide problem areas in the neck, chin and shoulders.
Take Action!
New knowledge is great! But it is likely fleeting if not followed by action. Recreating the principles outlined here will make them permanent in your mind. Practice these skills and you will eventually master them.
Stay updated on new articles and other releases by joining our email list. Your information is never shared with third parties and we don’t overdo it with the emails.
If you enjoyed this article, get email free updates
Article Takeaways
1. Create diagonal lines with your model's shoulders.
2. Avoid "football shoulders" and ninety-degree poses in favor of a forty-five degree angle to the camera.
3. Bend the spine by leaning your subject forward or back, depending on the situation.
4. The shoulders can be positioned to cover or minimize problem areas of a subject's body.