Realistic Photoshop Water Reflections
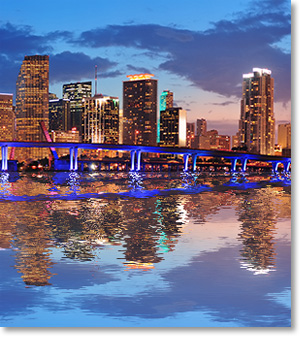
The displacement map filter in Photoshop has many applications for contouring designs to fit particular shapes like flags, bottles or even faces. Some of which will be the subject of future articles.
But for now, we will be creating realistic ripples in the waters with a reflection of our subject. For this tutorial it will be the waters of beautiful downtown Miami.
Before we start with the skyline, let’s create our displacement map. The general function of a displacement map is to change shape according the light and dark shades. We are going to create a detailed light and dark map. You can save this displacement map and use it for later projects of similar effect.
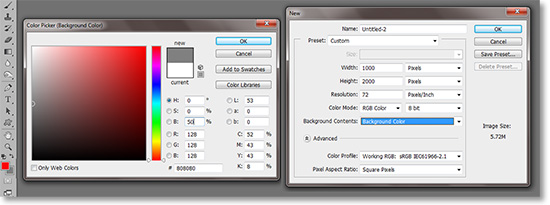
First, before even opening any image, open Photosohp and double-click on the background layer swatch. Select 50% in the color picker. This can be done quickly by setting the HSB portion of the color picker to H:0, S:0, B:50.
Start with a new blank document (Ctrl+N) set with the height twice as long as the width. Set the Background Contents to Backgrond Layer to fill it with the 50% gray.
In this tutorial, we are doing 1000x2000 pixels. All following adjustments are set for that size image. Go to Edit>Fill>50% gray.
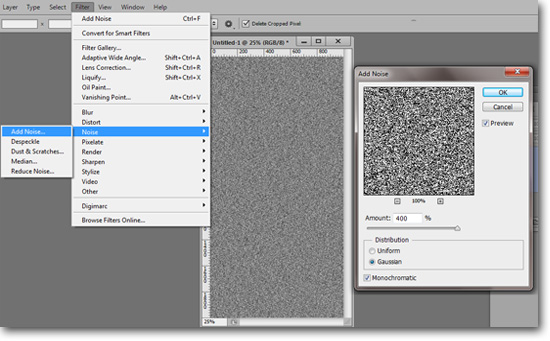
Go to Filter>Noise>Add Noise. Set to 400% and Gaussian with the Monochromatic box checked.
Go to Filter>Blur>Gaussian Blur and set it to “2” pixels.
Go to Window>Channels and select the Red Channel. Go to Filter>Stylize>Emboss and set the Angle to 90 degrees, the Height to 1 pixel, and the amount to 500%.
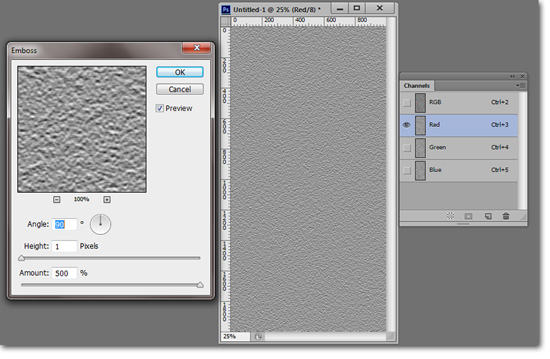
Again, go to the Channels Window and this time select the Green Channel. Go back to the Emboss filter and keep the same settings except this time set the degrees to 180.
Double-click over the Background layer and click OK in the resulting dialog box. Go to Edit>Transform>Perspective. Grab either of the two bottom edit points and pull it outward until it cannot move anymore. Click OK.
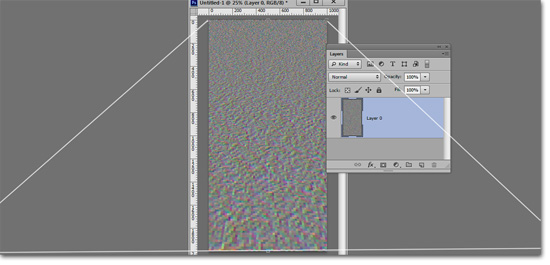
Go to Image>Image Size. Within the dialog box, uncheck the Retain Proportions box and bring the height back down to 1000 or a square if you have different dimensions. Save the image in a file you can remember and name it “Fine Water Map” as a psd file. This is your displacement map.
Edit the Skyline
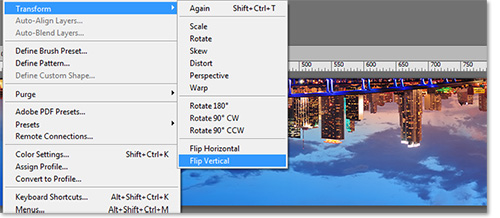
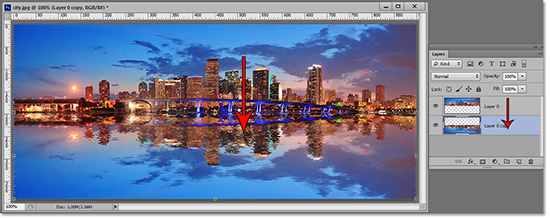
Open your image and double-click over the Background Layer. Click OK in the resulting dialog box. Now press Ctrl+J to duplicate the layer. Turn the top layer upside-down by going to Edit>Transform>Flip Vertically.
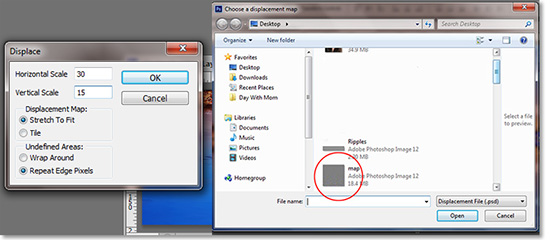
Next, we will apply the previously created displacement map. Go to Filter>Distort>Displacement. I set the Horizontal setting to 30 and the Vertical setting to 15. When you click OK, you will be taken to a dialog box. Go to the previously created displacement map and click OK
You may need to adjust the settings to your needs. If the settings are too much, undo it and retry at a lesser setting. If the setting is not enough, press Ctrl+F to repeat the filter. Keep doing that until you get the desired results.
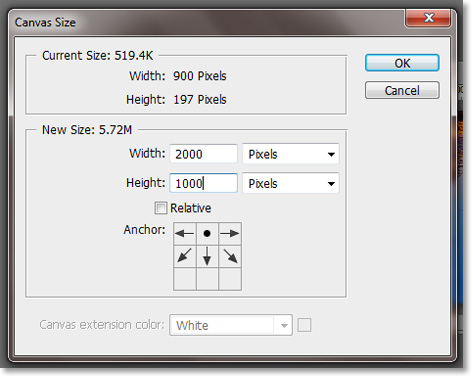
Double the height of your image by going to Image>Canvas Size. Click on the top-center square to extend the larger image from the top point. Click OK.
With the Layers Window, drag the distorted upside-down layer below the other. Select the Move Tool (M), then press and hold the Shift key while clicking and holding over the image to drag the distorted image straight downward to the proper point.
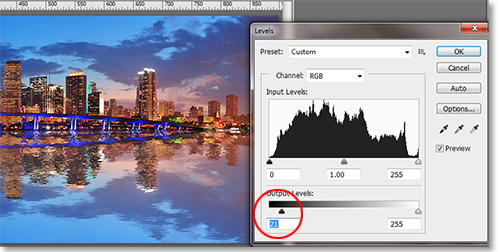
Bring up the black point a little by going to Image>Adjustments>Levels and raise the black output slider just a little. You also may want to blur the line where the two images meet with the Blur Tool.
There are plenty of uses for Displacement maps. We will cover more of these uses in the future.
Stay updated with all our new releases and articles by signing up for our free email updates. We only send emails once a week to keep you updated and we NEVER spam or share your information.


