Layer Mask Properties Editor Window
This article was originally supposed to be a mere section in our recent article on adjustment layers. However, it soon became obvious that this little window packed a lot punch and deserved its own detailed analysis. So without further ado, EZbackgrounds presents Editing Layer Masks within the Properties Window.
The ever-crafty engineers at Adobe have done it again. The properties window for masks is basically an all-in-one place to do mask editing tasks that are available elsewhere separately.
It’s available as a toggle button within any adjustment layer except the fill adjustment layers. Once a mask has been created, its properties box is just a double-click away with the cursor placed over the mask window in the Layers Palette.
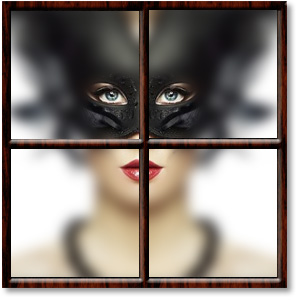
For our example image, we have duplicated the initial layer and applied a Gaussian Blur. Three clicks over the eyes and mouth with a black Brush Tool serve as our focal point for the effects of each feature. Where black is applied to the mask, the sharper image below is revealed.
Once into the Properties window, you will see an icon representing the mask at the top-left (1), which you may notice matches the mask window visible in the layer (2).
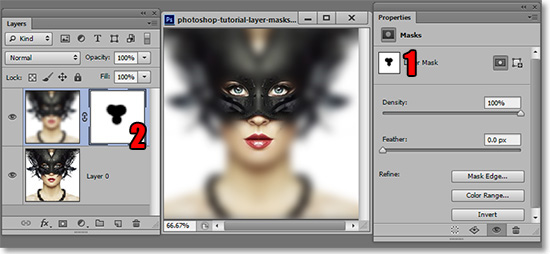
Below that is the Density slider (3) which reduces the effect of mask. As the density is reduced, the blur effect begins to reveal itself (4). This is good if you need to vary your density uniformly across the entire image. But more often than not, I find myself needing different shades of gray in adjustment applications.

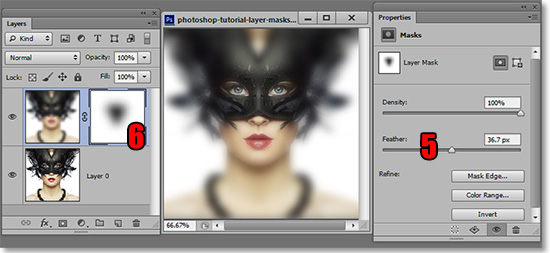
The next slider down is the Feathering feature (5) which softens the edge of the mask. Increasing the feather creates a gradient edge to the amount of pixels indicated. Notice how this softening is reflected in the thumbnail view within the layer (6).
The next two buttons down are the Mask Edge and Color Range. These two buttons both alter the mask based on a large variety of factors. So many different factors that we will need to do separate articles for each of those factors. Both of these mask editors are critical to working with digital backgrounds.
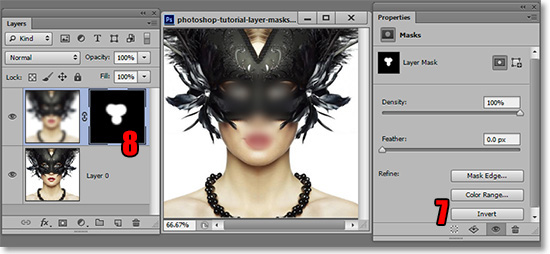
The button at the bottom is the Inverse effect (7)which turns what was once black to white and vice-versa (8).
You can view the mask as it appears over the image by placing your cursor directly over the mask in the Layers Window, pressing the Alt key and clicking.
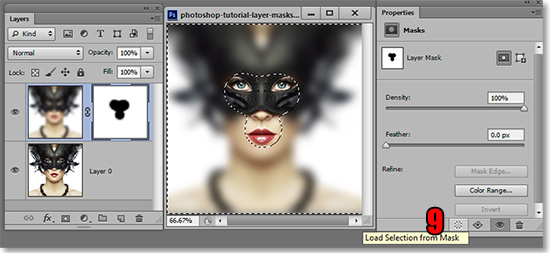
There are four buttons at the bottom of the Properties window. The first of which creates a selection from the mask (9). This can be useful when you want to create an isolated element. This function can also be done by pressing the Ctrl key and clicking directly over the mask within the Layers Window.
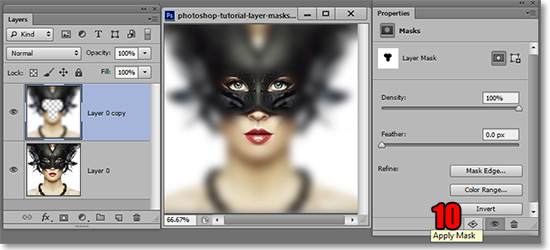
If you simply want to isolate the element to cut it from the layer, then the second button does that by applying the layer (10). Black pixels are cut, white pixels remain and every shade in between is applied accordingly.
The third button enables or disables the layer (11). This can also be done by pressing the Shift key and clicking directly over the mask within the Layers Window. The fourth button deletes the mask entirely.

Going back up to the top of the Properties window in the right corner you will see a toggle button indicating a rasterized mask or a vector mask (12). A rasterized mask is what you are likely used to working with unless you work primarily in Adobe Illustrator. For the purposes of this tutorial, a vector mask refers to a shape created using the pen tool.
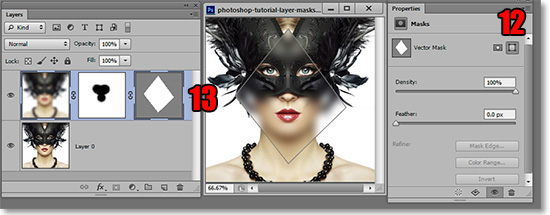
The vector mask is applied as a mask over the rasterized mask (13). Clicking on the Apply Mask button while the vector mask is active will result in that vector mask, and not the rasterized mask being applied. Confused? Don’t worry; you will not likely need to use it.
And there you have it. You may now return to the article you were previously reading.
Stay updated on our article releases. You’re not going to want to miss the Mask Edge explanation. It will open up a whole new world for you in Photoshop.