Posing Guide for the Head and Eyes
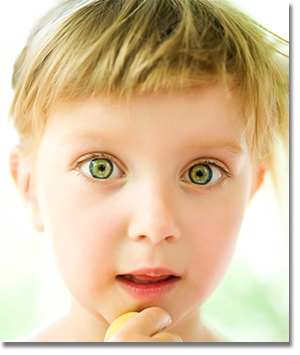
The head and, more specifically, the eyes are the focal point of any traditional portrait. Although other areas of the body are absolutely important to creating a pleasing image, the eyes and head will make or break any portrait.
As we highlight the various principles of posing the head and eyes, keep in mind that these are rules primarily for traditional portraiture. Other specialty portraits such as infant, fashion, couples, etc. have different purposes and therefore, different principles. We will cover these principles in future articles on the subject of posing.
I’ve Got My Eyes on You
One of the primary purposes of the traditional portrait is to connect the subject to the potential viewer of the portrait. With that goal in mind, it is almost always best for the subject to maintain eye contact with the viewer. Of course that means that your subject should be looking directly at the camera.
The eyes have been called the window to the soul for a reason. They can convey many emotions and subtle nuances. For instance, if your model is looking at a camera lens, they will look less engaged than if they are looking at another person’s eyes. Even the tiniest differences in the facial expressions will show through. For this reason, it is critical to interact with your subject.
Much like a director in a movie, you are responsible for creating the emotional mood of your subject. This can’t always be done properly for a variety of reasons. Maybe your subject is having a bad day, for instance. However, it is always possible to diminish the intended emotional atmosphere by bringing your own emotional baggage to a shoot.
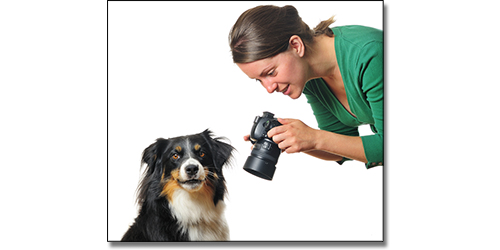
As a professional, it is your responsibility to temporarily put aside any emotions that would conflict with the goal of the shoot. You do not want to convey any emotion that you do not want to see displayed on your subject’s face. They will pick it up, even if only on a subconscious level.
Are You Looking at Me?
Since you want the subject to maintain eye contact with both you and the camera lens, it is essential that you keep your face very close to the camera when shooting. This may seem obvious, but it can be easy to forget if your camera is on a tripod. We’ve all seen photographers do this; stand far aside from the camera and engage the subject. This results in a look that makes the subject appear distracted by something rather than engaged. Just peer over the camera or slightly to the side and your subject will appear to looking directly into the lens.
If you feel that an off-camera gaze is necessary, here are a few things to keep in mind. Eyes to camera-right indicate looking forward to the future. Eyes to camera-left indicate the past. Eyes up are positive or hopeful; whereas eyes down indicate contemplation or melancholy. Eyes to the side just generally look distracted. These angles can be used together as well. For instance, posing eyes up an to the right would indicate hope for the future. Of course, these are not precise indicators of emotion; but the general ideas can be applied to a variety of situations.

A subject’s eyes should follow the line of the nose. This is particularly important when the gaze is off-camera or the model will simply look distracted.
Slightly off-centered eyes; positioned midway between the nose and the corners is a good pose as well. Try not to completely eliminate the whites of the eyes from any one side; but, more importantly, avoid a large area of the white showing or it will be distracting.

This is probably a good point to mention that the eyes are the one body part that breaks the rule that says if you have two of them, make them different. As if it actually needed to be said, crossed eyes are rarely appropriate in any portrait.
No Zombies Allowed!
Catchlights are essential in any portrait. They are the reflections of lights within the eyeballs. If the eyes are the window to the soul, catchlights mean that the lights are on. Having no visible catchlights in the eyes will make a person look creepy or soulless. All too often they are ignored or forgotten by photographers, particularly in full-body and outdoor shots. This will almost always diminish the portrait to some degree.
Catchlights at the eleven o’clock and one o’clock position of the eyes are generally optimal. One or two catchlights are preferred. More can indicate exuberance or even a manic feeling.

Watch for the catchlights disappearing when lowering the chin or shooting outdoors on a cloudy day. You may have to resort to adding the catchlights in post-processing. We will be releasing a new catchlight brush series soon along with a video tutorial on their usage.
Posing the Head
As with all joints, you should bend them. The head is no different. A tilt of the head can be a powerful conveyance in portrait. As we learned previously in the Shoulders Posing Guide, your subject’s shoulders should be posed diagonally for a more pleasing effect. This creates a higher and a lower shoulder.
A head tilt to the higher shoulder is considered feminine. Conversely, a head tilt to the lower shoulder is considered masculine. A woman’s head can be tilted toward the masculine side, but a man’s head should rarely be tilted to the feminine side.
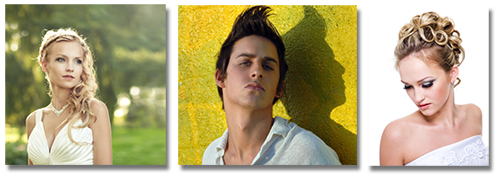
This is a good example of why it is essential to know the intent of your portraits when pre-consulting with your client. If you are posing a senior girl who wants to convey a fashion-style portrait, then the high shoulder pose is best. But if she want to convey her sporting prowess or some other type of authority, then a tilt to the lower shoulder would be more apt.
The head must supported by shoulders or framed by hands and arms. Even the best of subjects will look strange with a floating head.
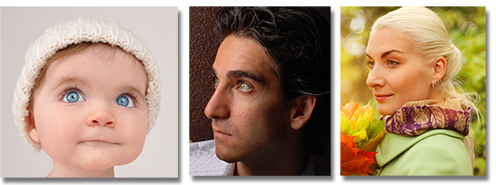
When turning the head, do not let the nose break the plane of the cheek or it will look larger than normal. Also, do not let the eye farthest from the camera disappear nor should you let the eyeball become part of the edge of the face.
It is usually best to have your subject elongate their neck and project the chin. This is true more so of overweight people. Make sure the neck is not turned so far as to either exaggerate the tendons or accentuate a double chin.
Although not necessarily a posing tip, you should also try to keep a higher camera angle with overweight people when shooting head and shoulders shots.
That's That
This wraps up our posing guide for the body in traditional portraits. Coming articles will include such specialty posing guides for infants, seniors, groups and more. Our next article will cover corrective techniques for facial and body flaws that you may encounter in clients.
Stay updated with all our new releases and articles by signing up for our free email updates. We only send emails once a week to keep you updated and we NEVER spam or share your information. We’ve got that catchlight brush series and tutorials coming up as well.
If you enjoyed this article, get email free updates
Article Takeaways
1. Eyes should follow the line of the nose.
2. Eyes are best looking into the camera.
3. Engage with your subject. Don't express anything you don't want to see on your model's face.
4. Make sure catchlights are visible in the eyes.
5. Head tilt to the upper shoulder is feminine. Head tilt to the lower shoulder is masculine.


