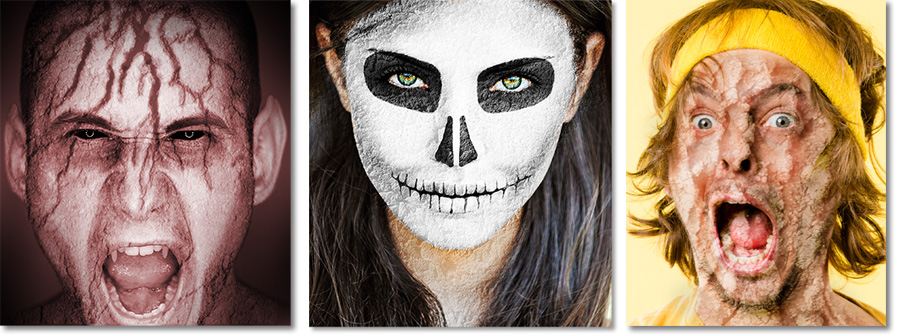
4 EZ Photoshop Tips for Halloween
We thought you might want to tweak a selfie or make a treat for your kids for Halloween, so we came up with four quick and easy ways to make the season a little spookier with Photoshop.
1. Vampire Fangs
Here’s an easy method you can sink your teeth into.
Select the Lasso Tool from the Tools Palette. Draw the shape of a fang as large as possible within one of the existing canine/eye teeth (1). Copy the selection (Ctrl+C), then paste (Ctrl+V). Press Ctrl+T to bring up the Free Transform bounding box. Grab the bottom-center edit point and drag downward (2). You may want to use the Move Tool (V) to adjust the position just right.
The images below illustrate the steps from left to right. You will have to apply each step to each tooth.

Your results will likely not look exactly like a fang at this point (3). Use the Eraser Tool with a soft-edged brush to shape the tooth sharper (4). You may need to adjustments to the brightness to blend with the tooth below.
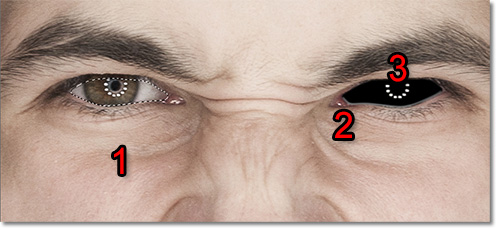
2. Zombie Eyes
Create dead empty eyes or black eyeballs with this easy method.
Select the Lasso Tool and encircle the visible parts of the eyeball including the whites, iris and pupil; but not the small red ridges between the skin and eyeball (1).
Create a new layer (Shift+Ctrl+N). Press D to set your foreground and background colors to the default black and white. Press Alt+Backspace to fill the selected area with black (2). You may want to apply a small Gaussian Blur to soften the edges (Filter>Blur>Gaussian Blur).
Thus far, you have created empty eyes. To create black eyeballs, you only need to do one more step and create a catchlight above the black layer you just created (3).
Make your foreground color white, and create a new layer (Shift+Ctrl+N). Select a hard-edged brush and click once over the appropriate area of each eye. You may want to do a light Gaussian Blur or adjust the layer opacity down.
3. Demon Ears
Pointed ears are very versatile in that they can be applied to demonic, animal or fantasy effects. This technique is very similar to the fangs procedure, but instead of elongating the ears with a transformation, we will be using the Liquify Filter.

Select the Lasso Tool and surround the top portion of the ear. Copy it and paste it, then go to the Liquify Filter(Filter>Liquify or Shift+Ctrl+X). Pick the Forward Warp Tool (W) with a brush size about the same size as the top of the ear. Push upward and check your results. It may take a few times to get it right. Click OK and make any adjustments needed to blend with the original ear.
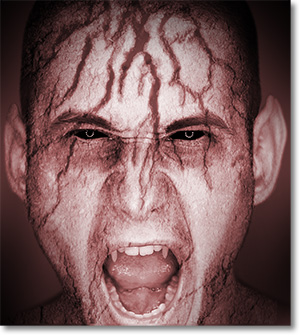
4. Skin of the Undead
Use textures and blending modes to easily create the illusion of decaying or rotting flesh. Generally, the best textures are peeling paint or dried earth, but really the only limit is one’s own imagination.
Open your selected texture. Press Ctrl+A to select the entire texture image, then Ctrl+C to copy it. Click on your subject image to highlight it and press Ctrl+V to paste the texture.
You will likely want to use one of four blending modes; Overlay, Soft Light, Multiply or Screen; but you can scroll through all the available layers to see how they work. I find that a Soft Light blend mode, then duplicate the layer and reduce the opacity by about 50-70%.
If you can’t get the blend just right, you might want to try the method described on our Dia de los Muertos tutorial.
Play around with the Burn Tool under the eyes and on the cheeks. Or use the Dodge Tool to make the face pale. Have fun whatever you decide. Happy Halloween!
Related articles:
Stay updated with all our new releases and articles by signing up for our free email updates. We only send emails once a week to keep you updated and we NEVER spam or share your information.